Quick Start Guide
This guide is written for the RYMCU BigSmart AI assistant. It helps users complete first boot, network setup, voice interaction, SD card resource preparation, music playback, video playback, and USB disk mode.
For complete build, flashing, and hardware details, see the User Manual and Hardware Configuration.
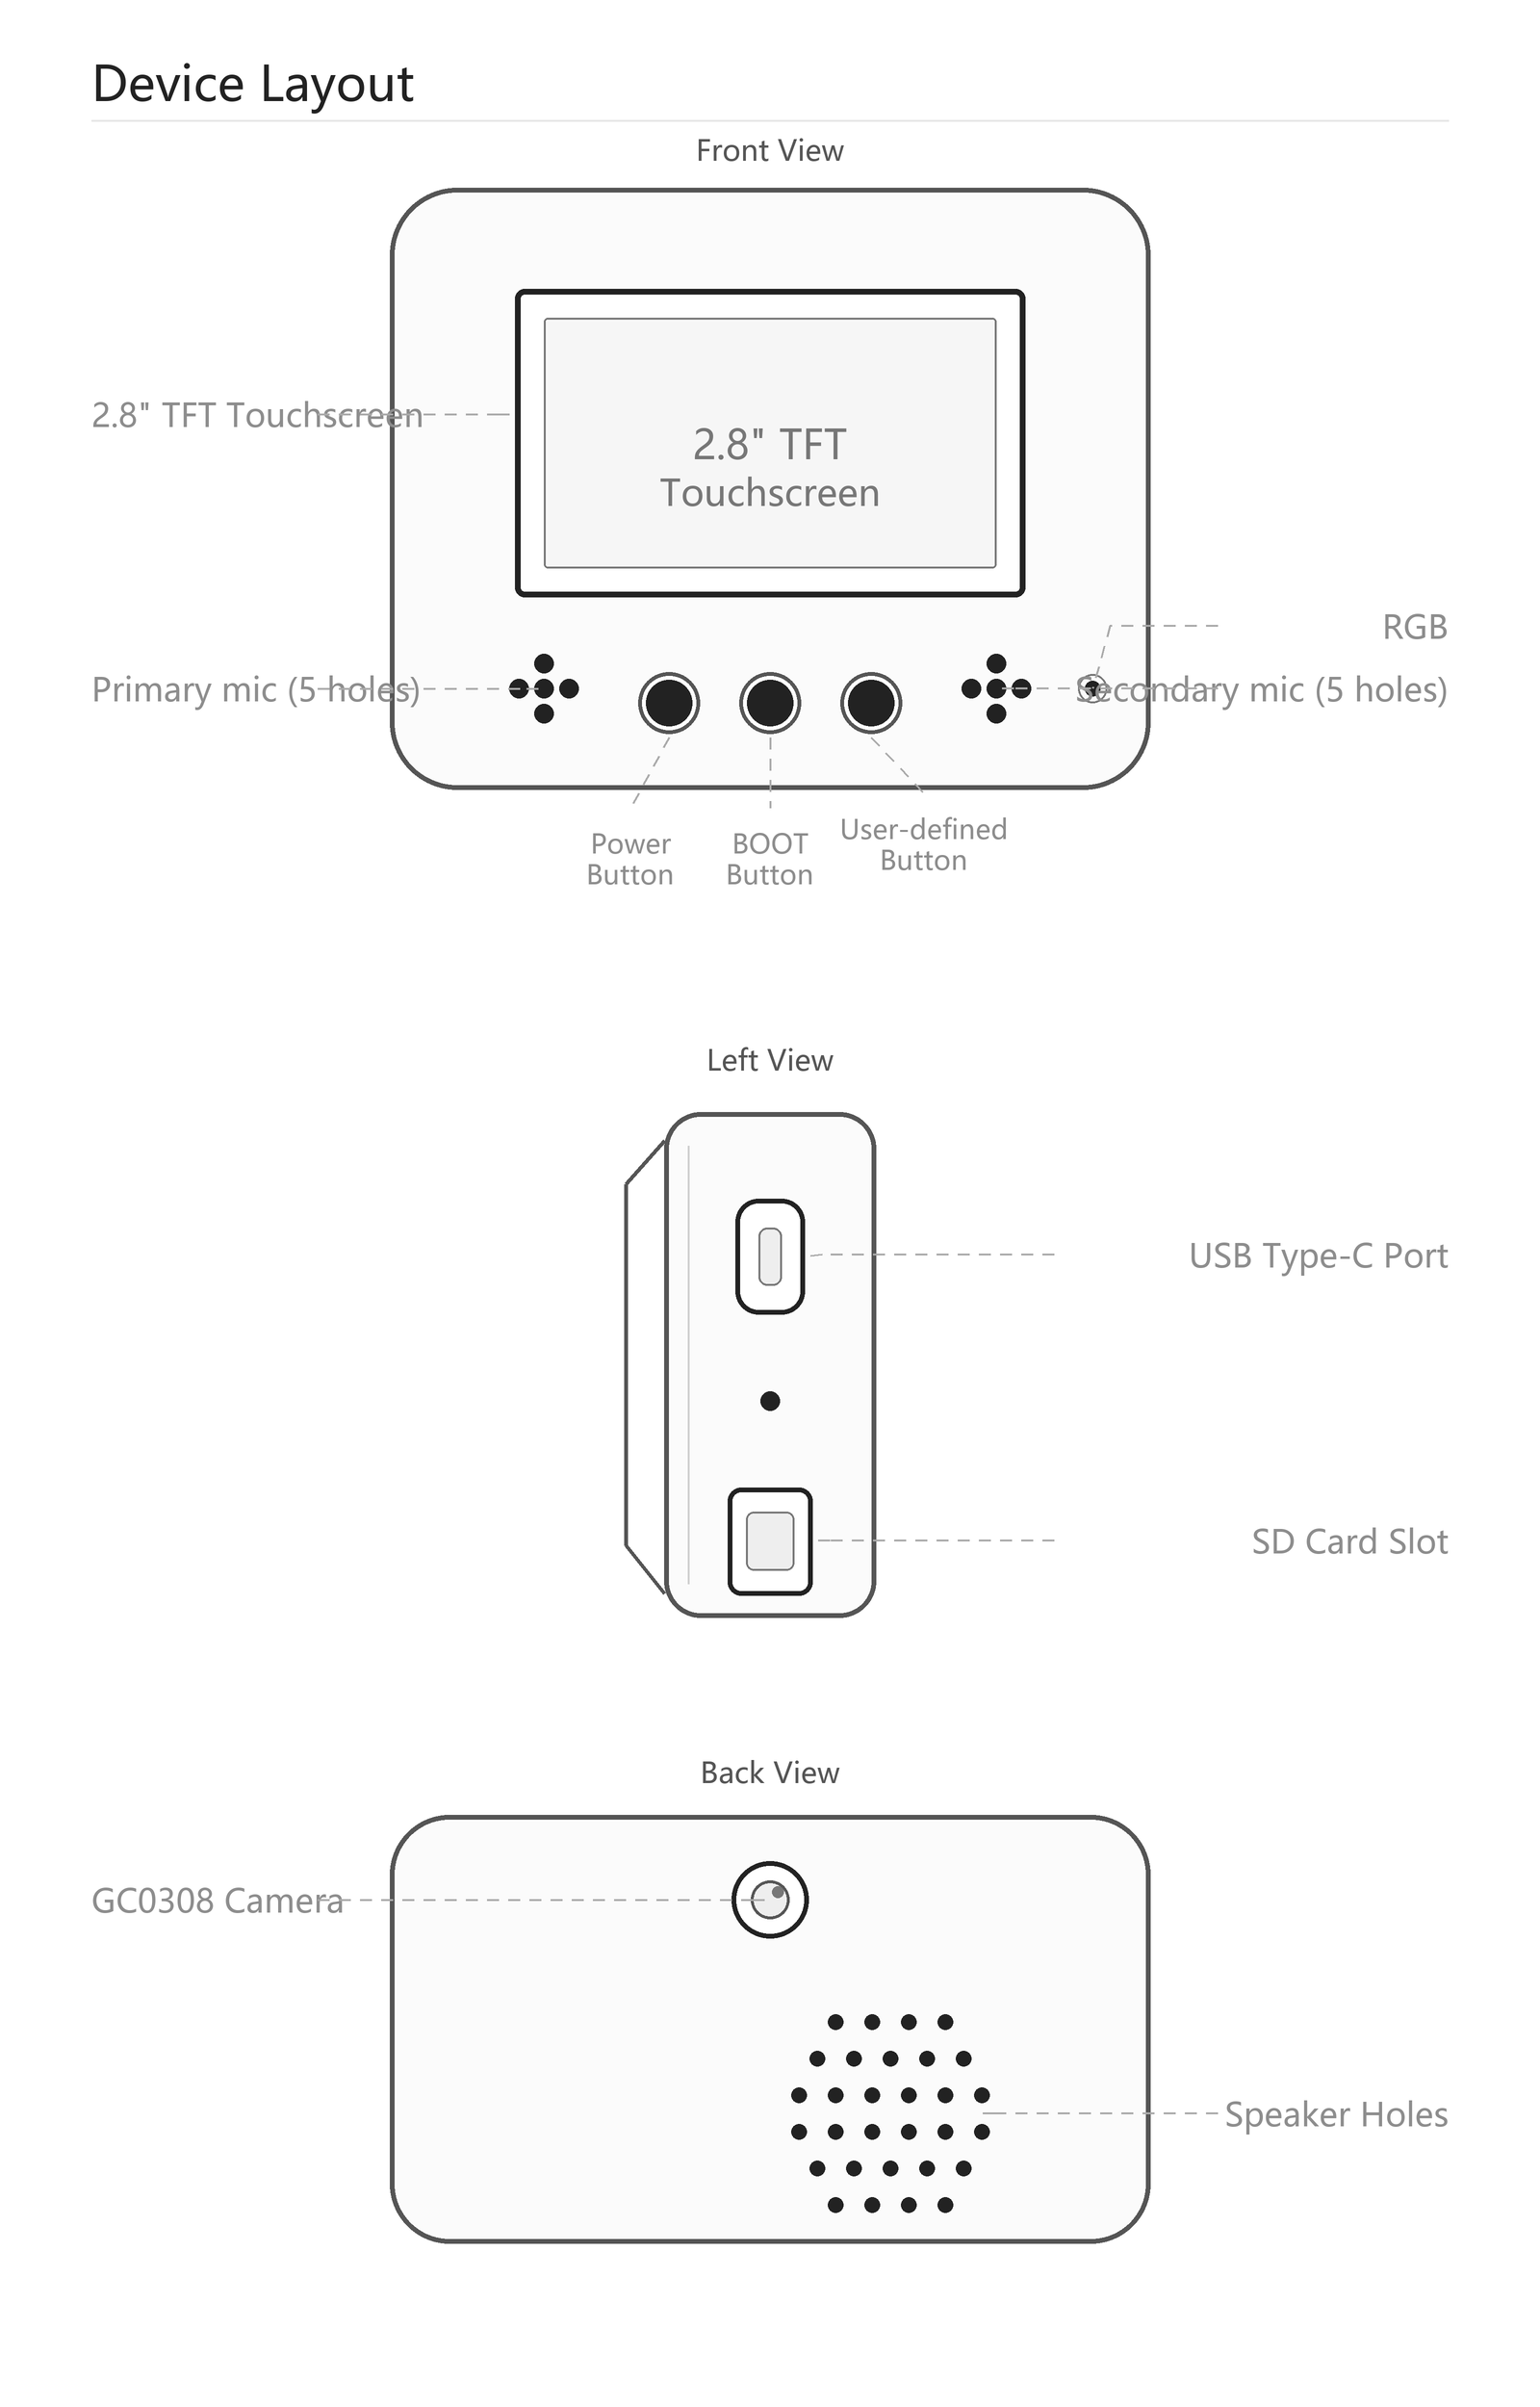
1. Firmware and Flashing
BigSmart ships with the RYMCU official firmware preinstalled and can be used directly after power-on. To upgrade or switch firmware, see the firmware flashing guide.
The firmware images in this repository are merged images. When using a flashing tool, write the image to Flash offset 0x0.
The recommended image is rymcu-V2.3.28-merged.bin; rymcu-V2.3.19-merged.bin remains available as a legacy fallback. The V2.3.28 prebuilt image includes Weather, Calendar, Codex Status, Smart Home MQTT/Endpoint, the NES launcher, and NES dedicated boot mode. It does not include the later NES display, audio, and volume-control changes from the 2026-07-28 commit b1d1c08.
2. Power On and Home Screen
2.1 Power On
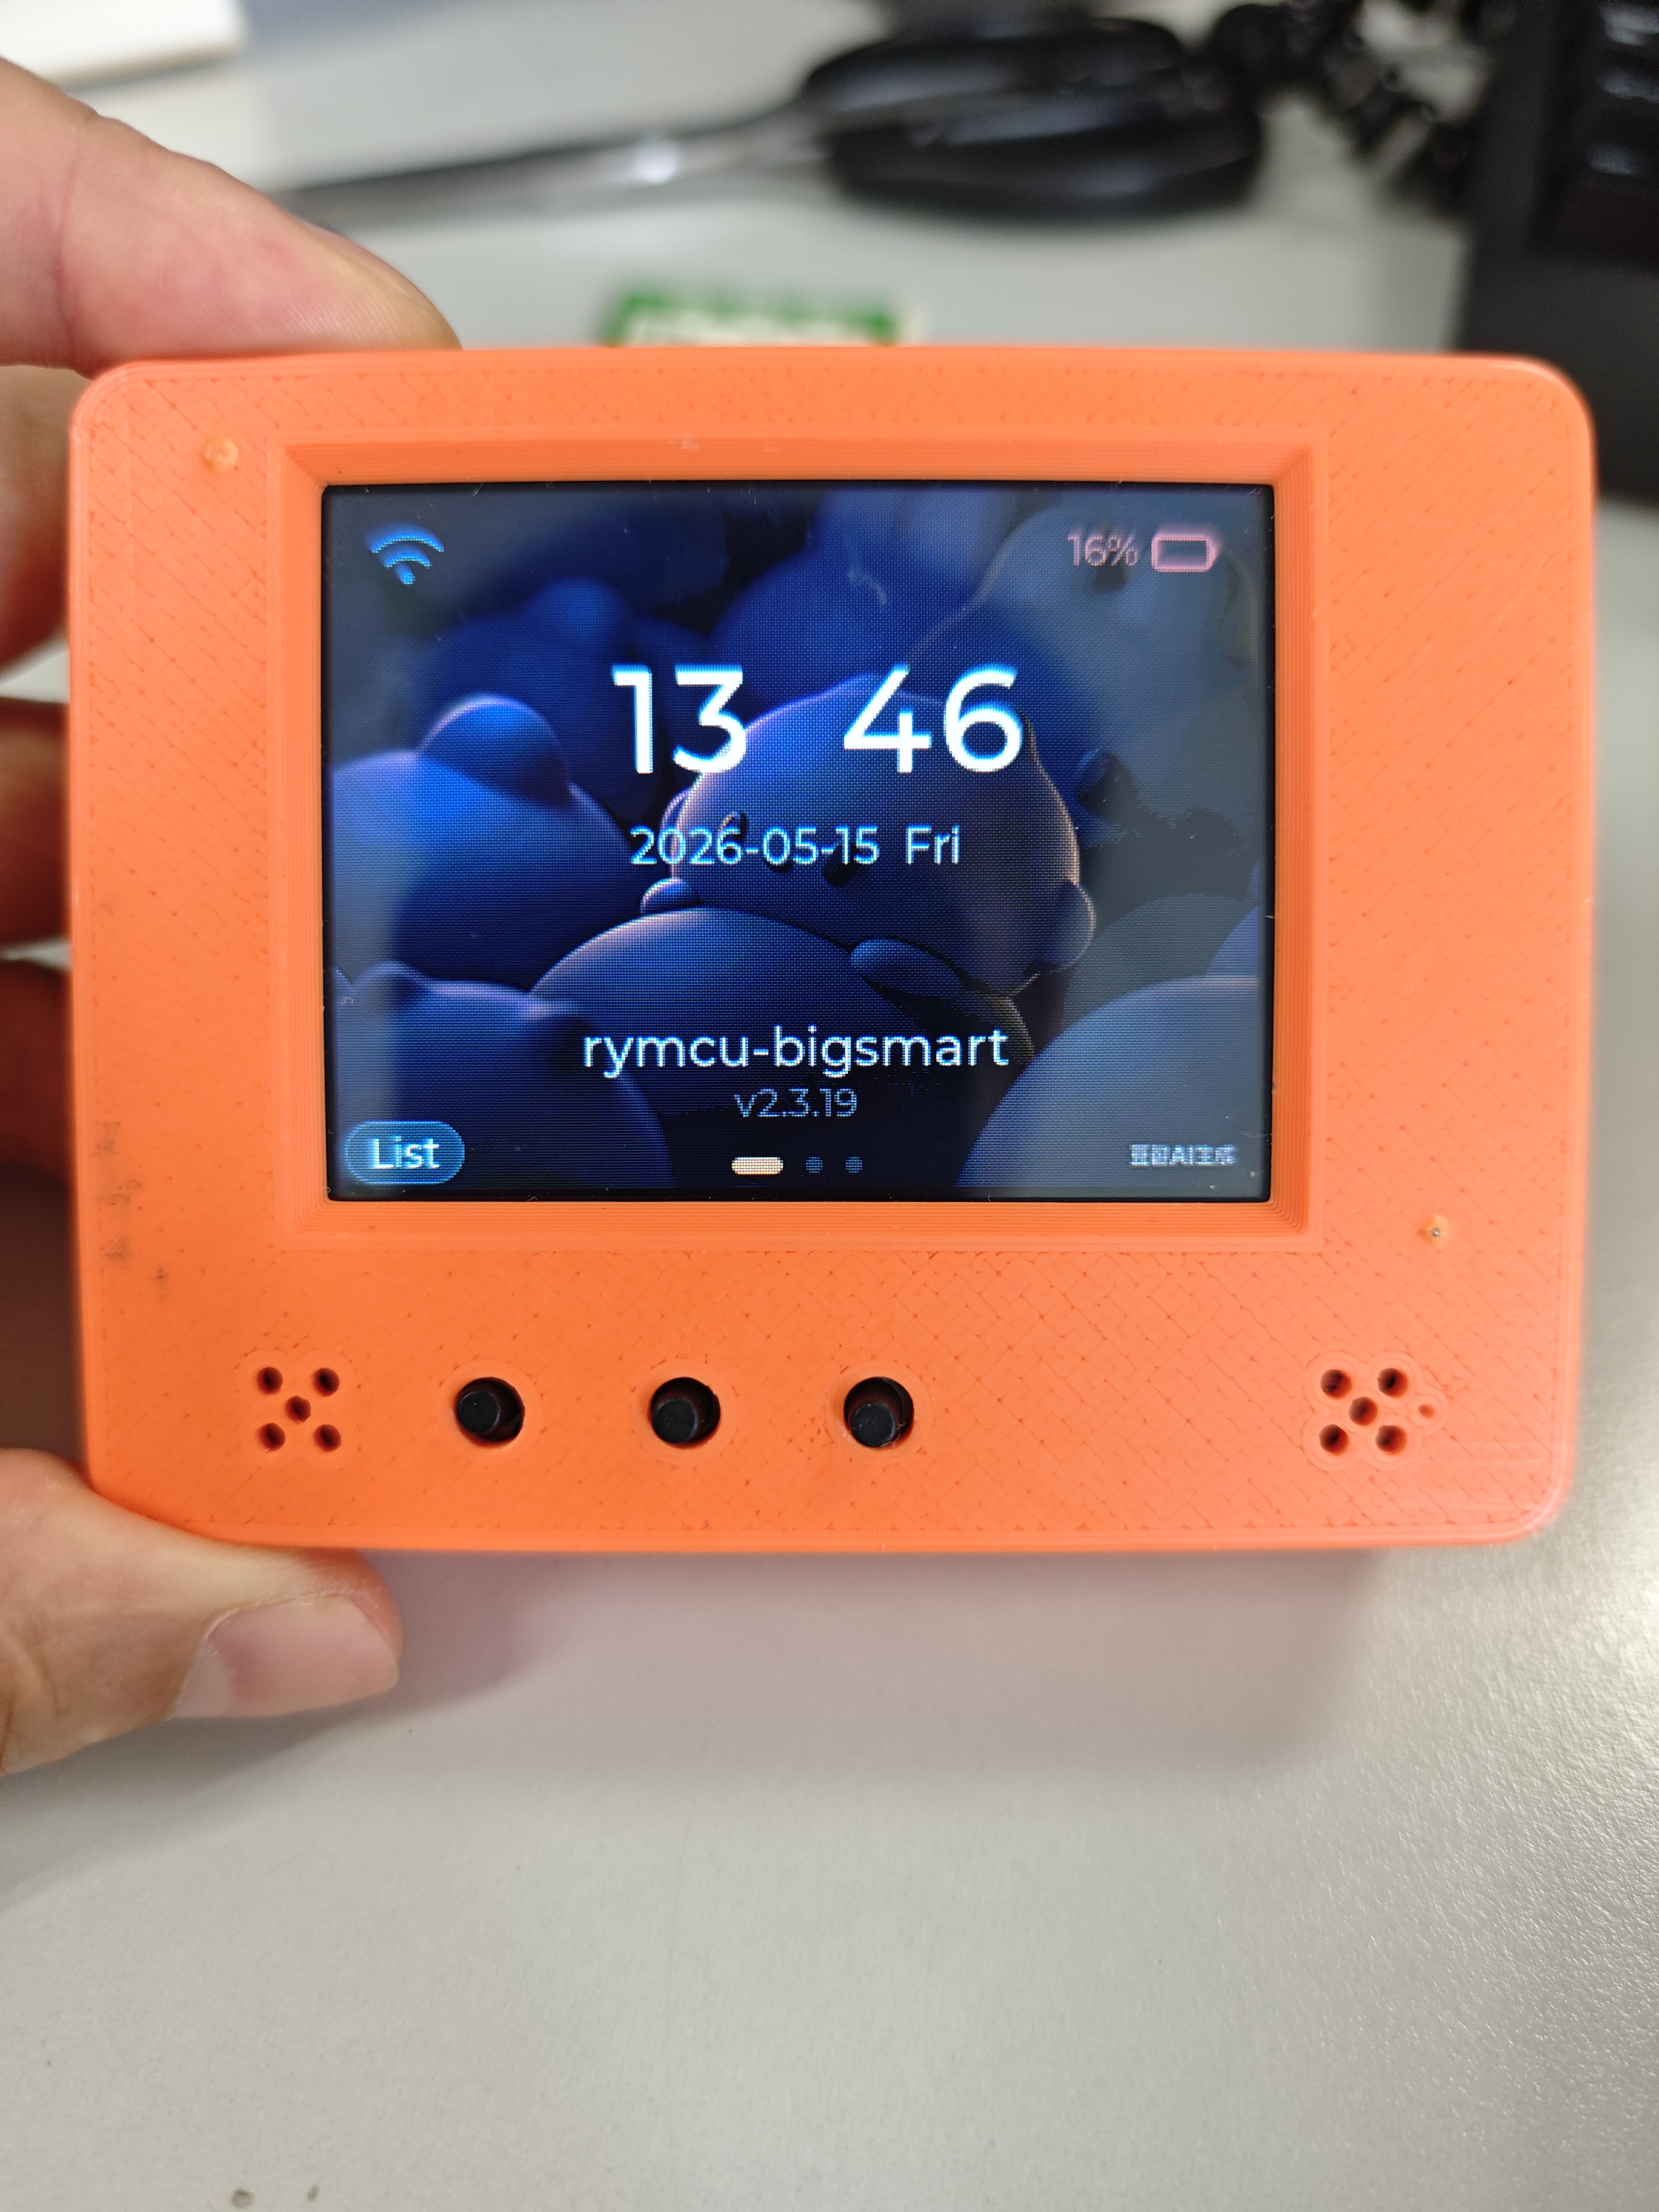
- Hold the power button for about
3seconds to power on. When powered on, hold it again to power off. - If the battery is low, connect the board to a computer or
5Vpower supply with aUSB Type-Cdata cable. - After the screen turns on, the
Homescreen appears and showsrymcu-bigsmartand the current firmware version. - To view logs, connect to the corresponding
COMport with a serial terminal.
2.2 Home Screen and Apps
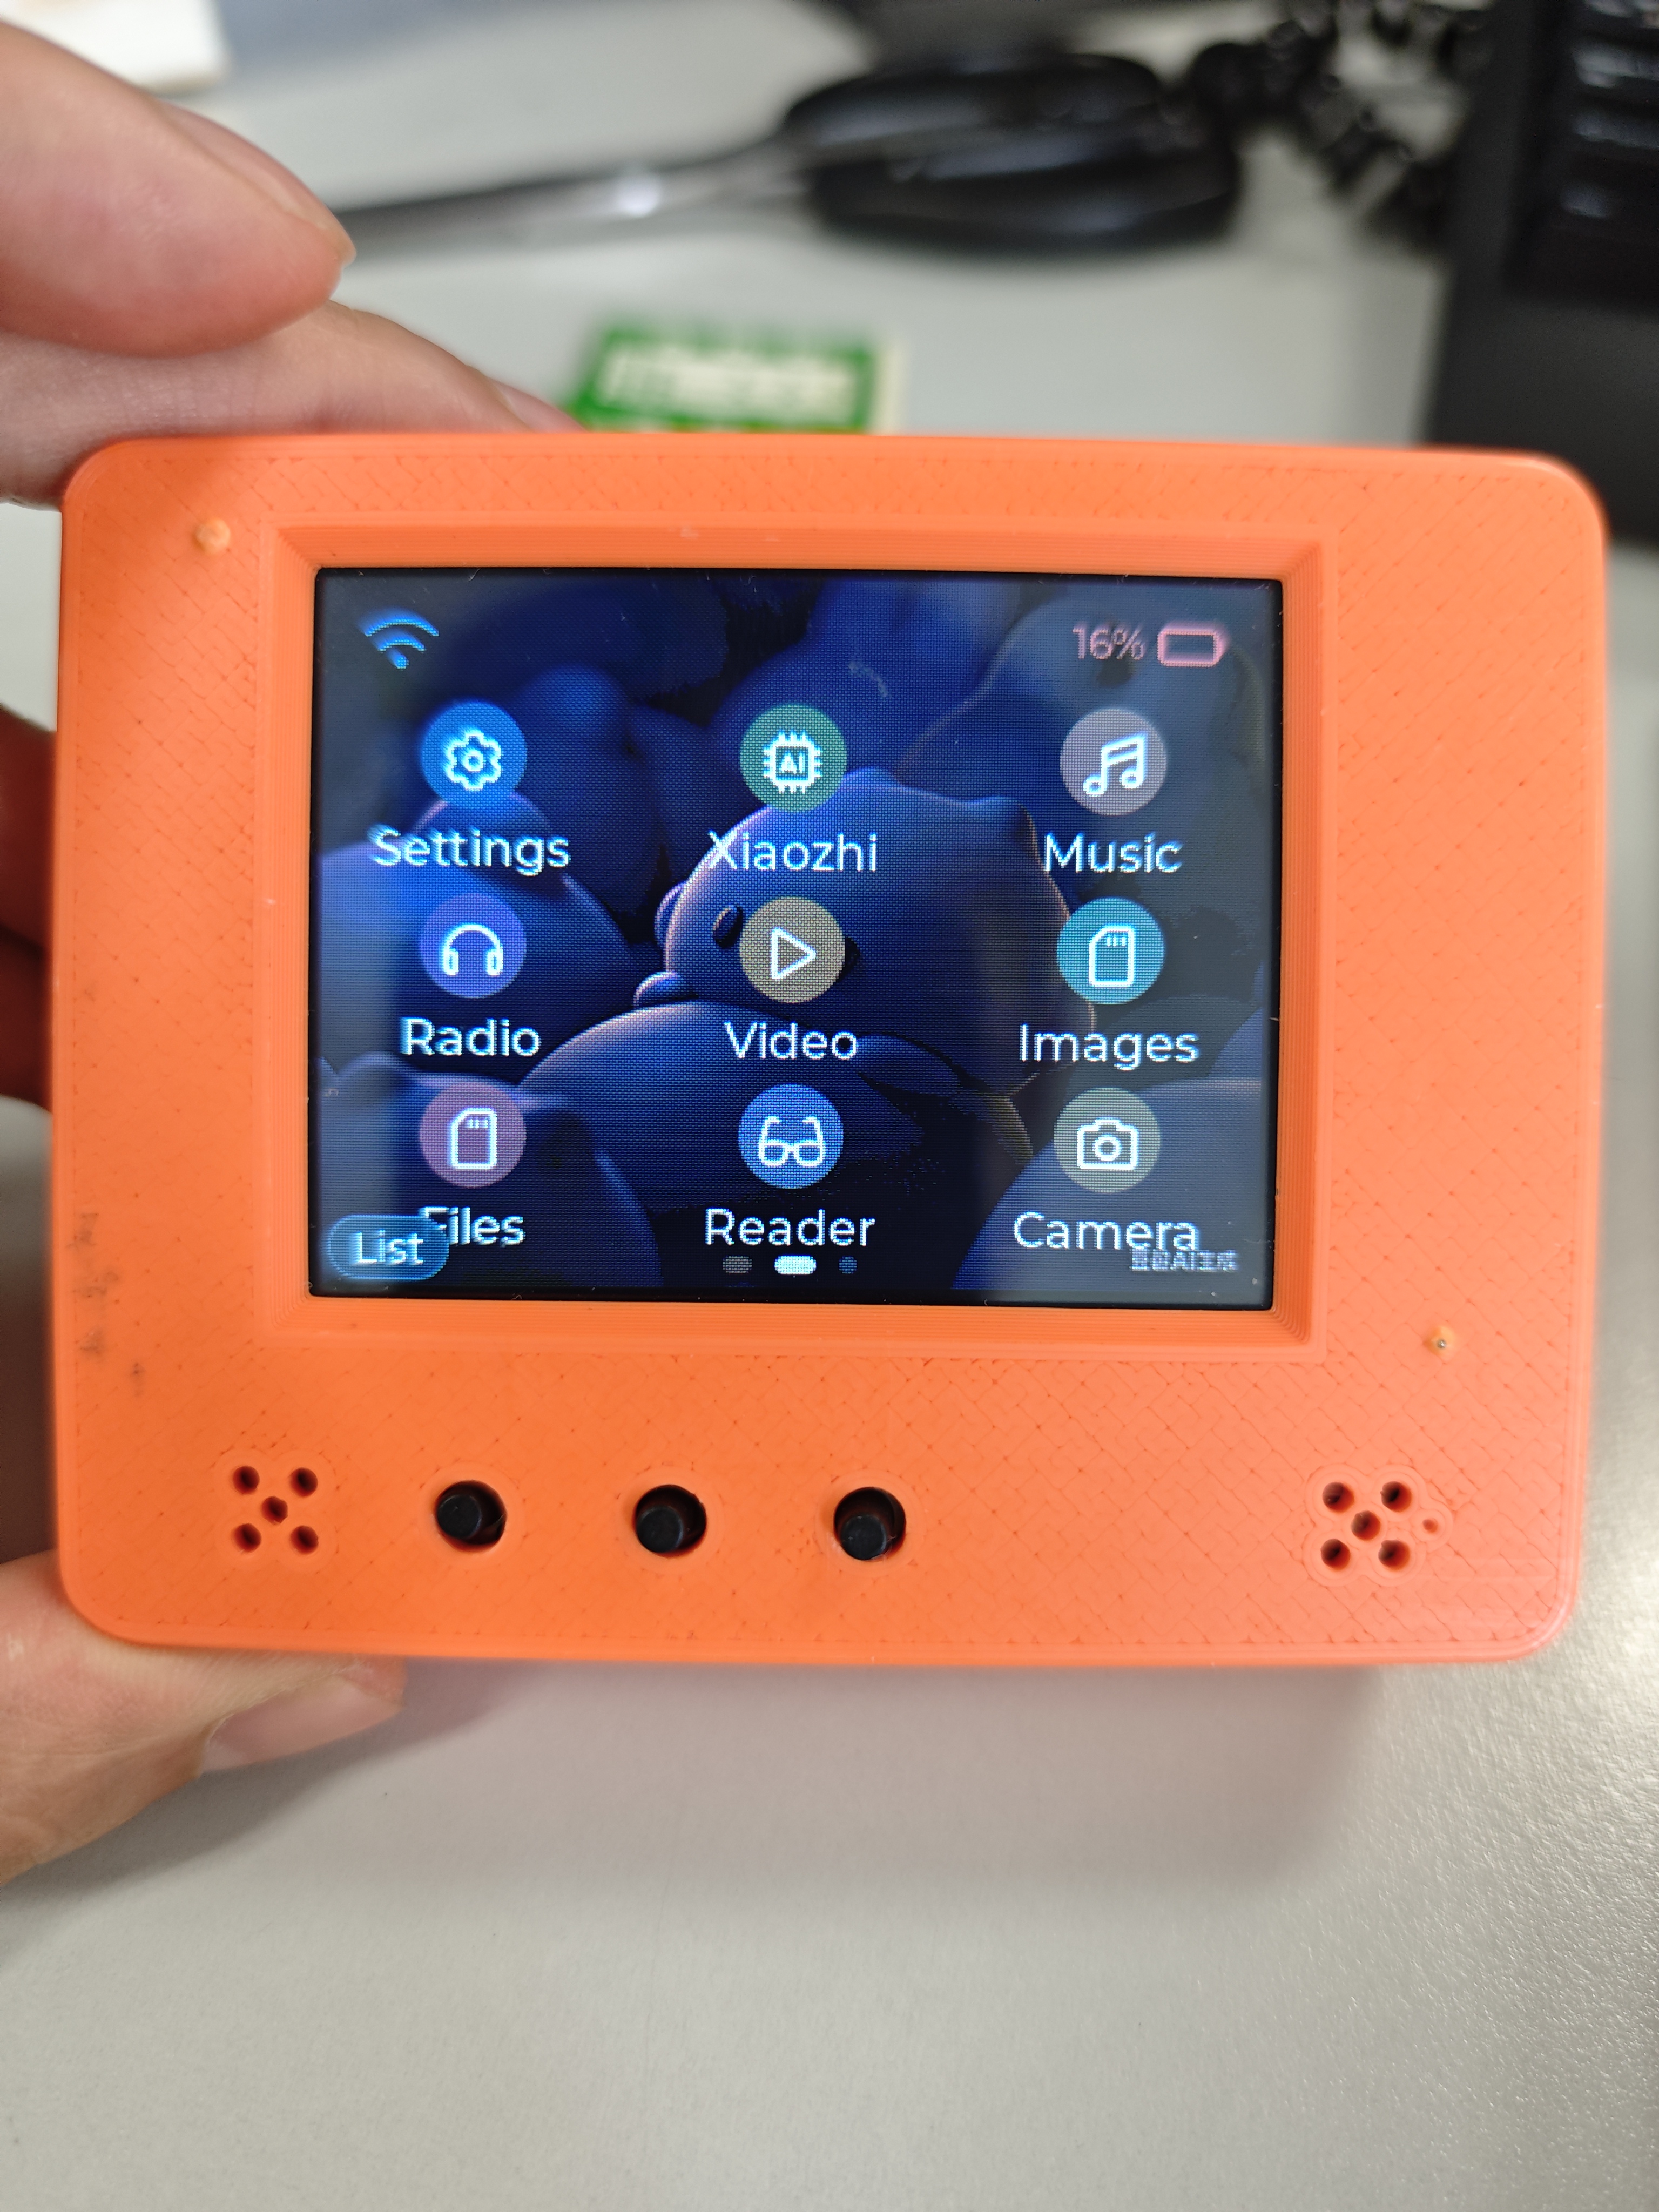
Swipe left or right on the Home screen to switch app pages. Common apps include:
| App | Purpose |
|---|---|
| Xiaozhi | Start the Xiaozhi voice assistant |
| Settings | Configure Wi-Fi, server, display, and other settings |
| Music | Play MP3 files from the SD card |
| Radio | Play internet radio |
| Weather | View weather information |
| Calendar | View the calendar |
| Video | Play video resources from /sdcard/videos |
| Image | View image resources |
| Camera | Use the GC0308 camera |
| Gyro | View QMI8658 attitude and sensor information |
| Codex | View Codex status and bridge settings entry |
| NES | Select an NES ROM from the SD card and reboot into NES dedicated boot mode |
| Games | Enter game-related features |
| USB Disk | Reboot into USB disk mode and share the SD card with a PC |
Use the touch screen to open apps, go back, select files, and adjust settings.
3. Wi-Fi Setup
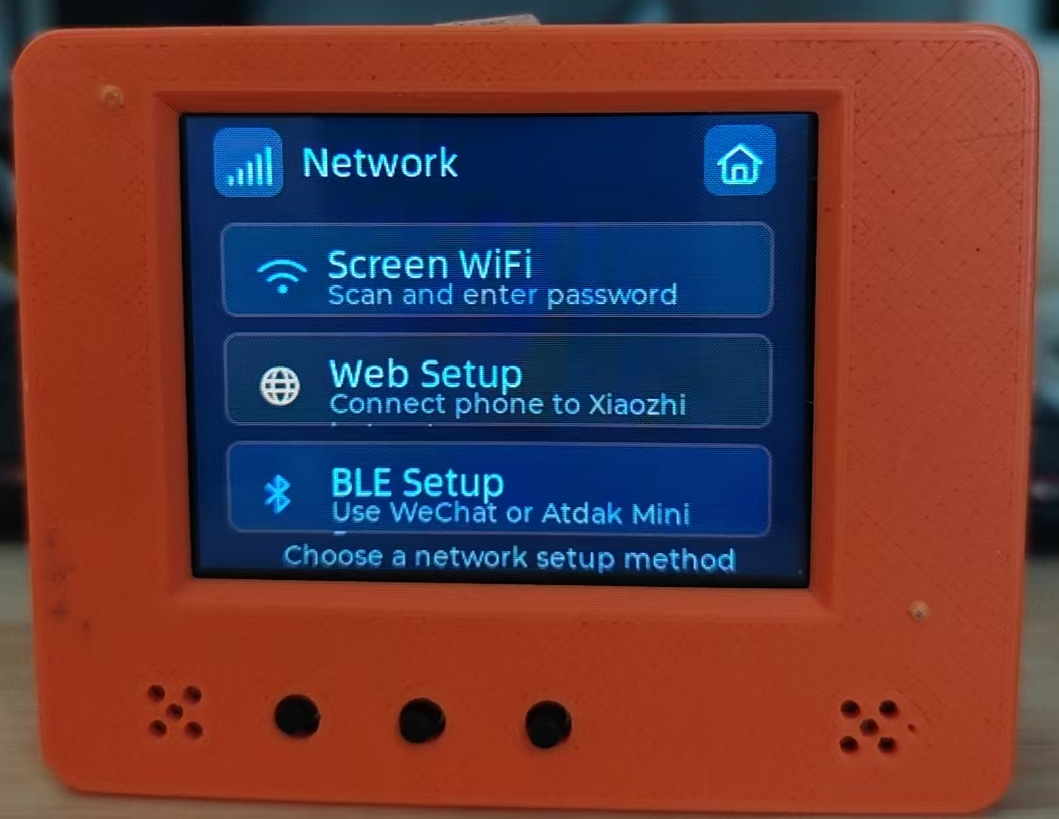
Wi-Fi must be configured before first use. BigSmart supports three provisioning methods: on-screen setup, hotspot web setup, and WeChat mini program BLE setup. Choose any one of them.
Open the Settings app and enter the Wi-Fi settings page.
Note: BigSmart supports 2.4 GHz Wi-Fi only.
3.1 On-screen Wi-Fi Setup
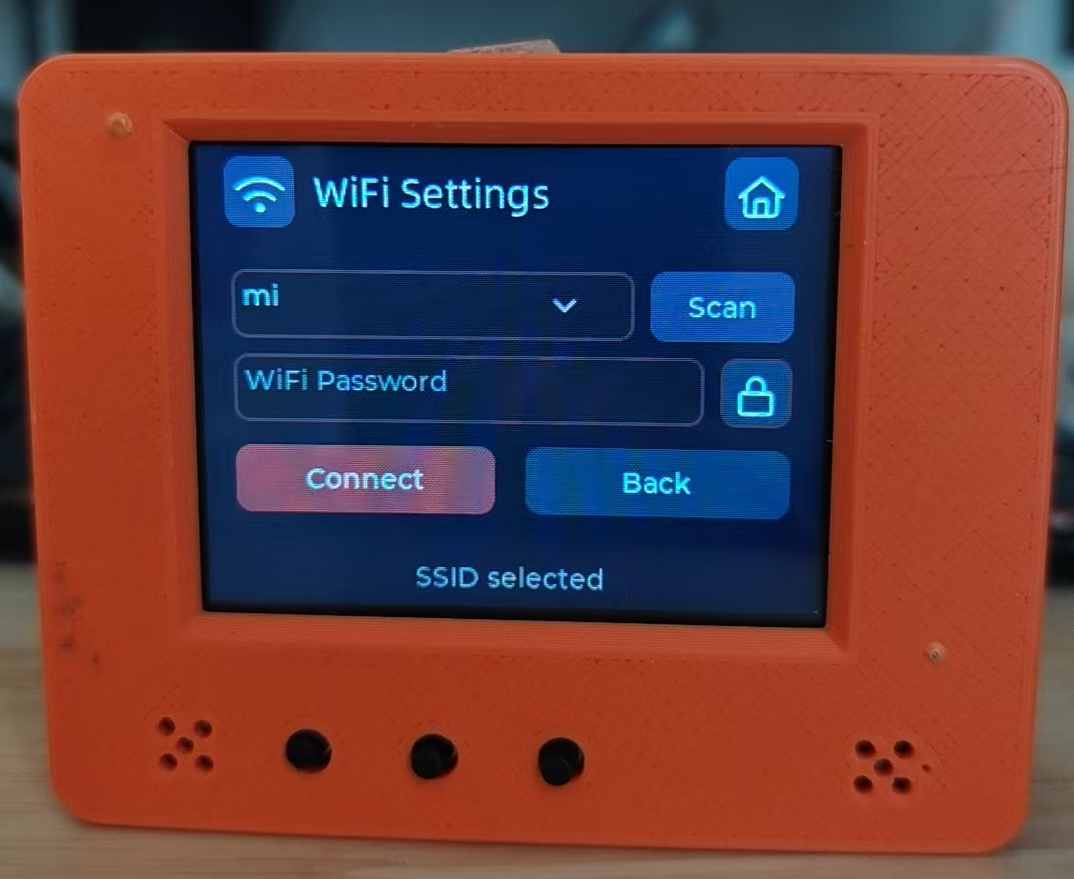
Tap Screen WiFi, enter the Wi-Fi SSID and password, and tap Connect.
3.2 Hotspot Web Setup
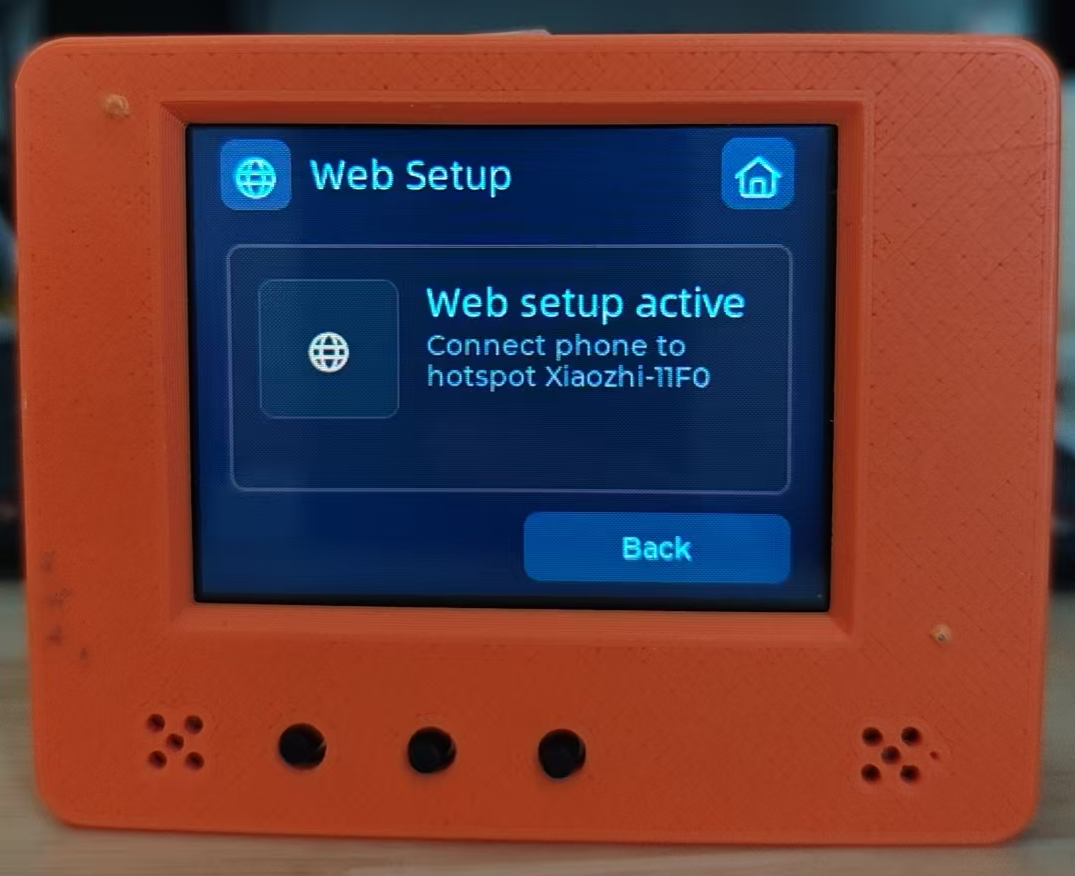
Tap Web Setup to open hotspot provisioning. Connect your phone to the hotspot shown on the screen, such as Xiaozhi-11F0. The phone usually opens the setup page automatically; if not, open the browser page shown by the device and enter the Wi-Fi information manually.
3.3 WeChat Mini Program BLE Setup
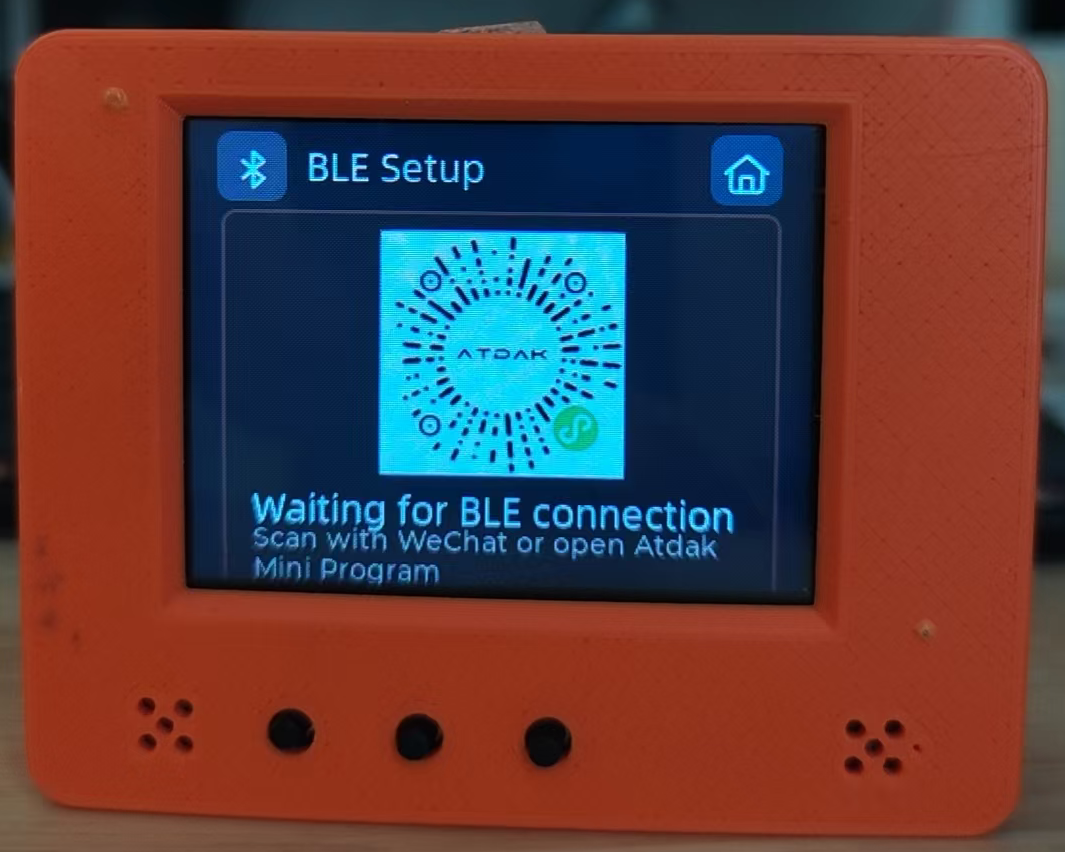
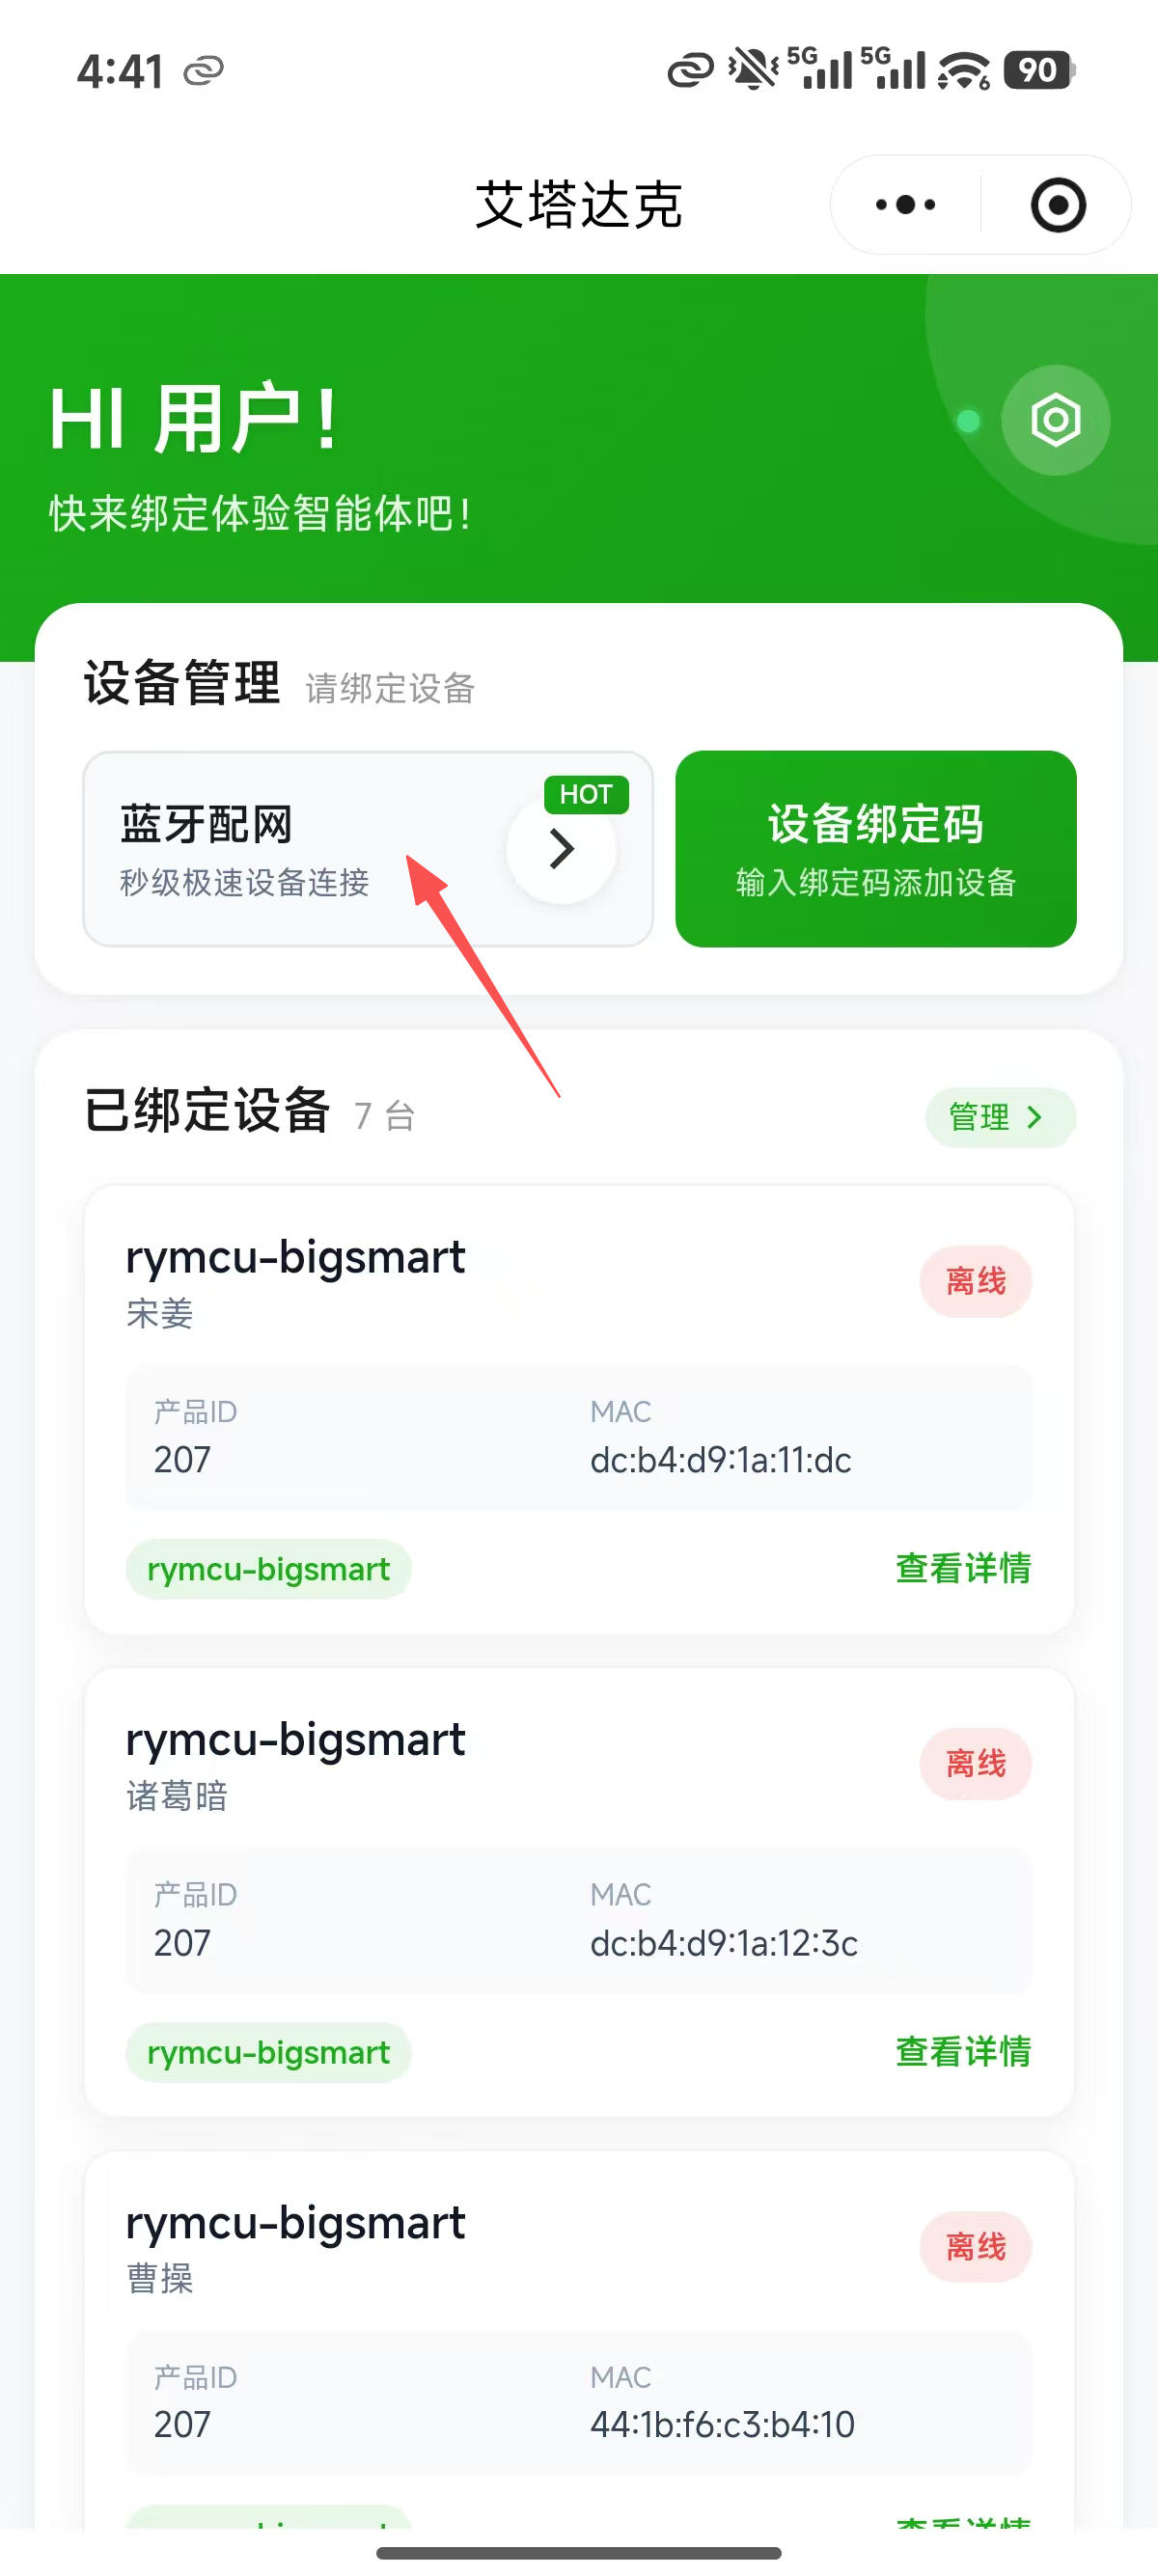
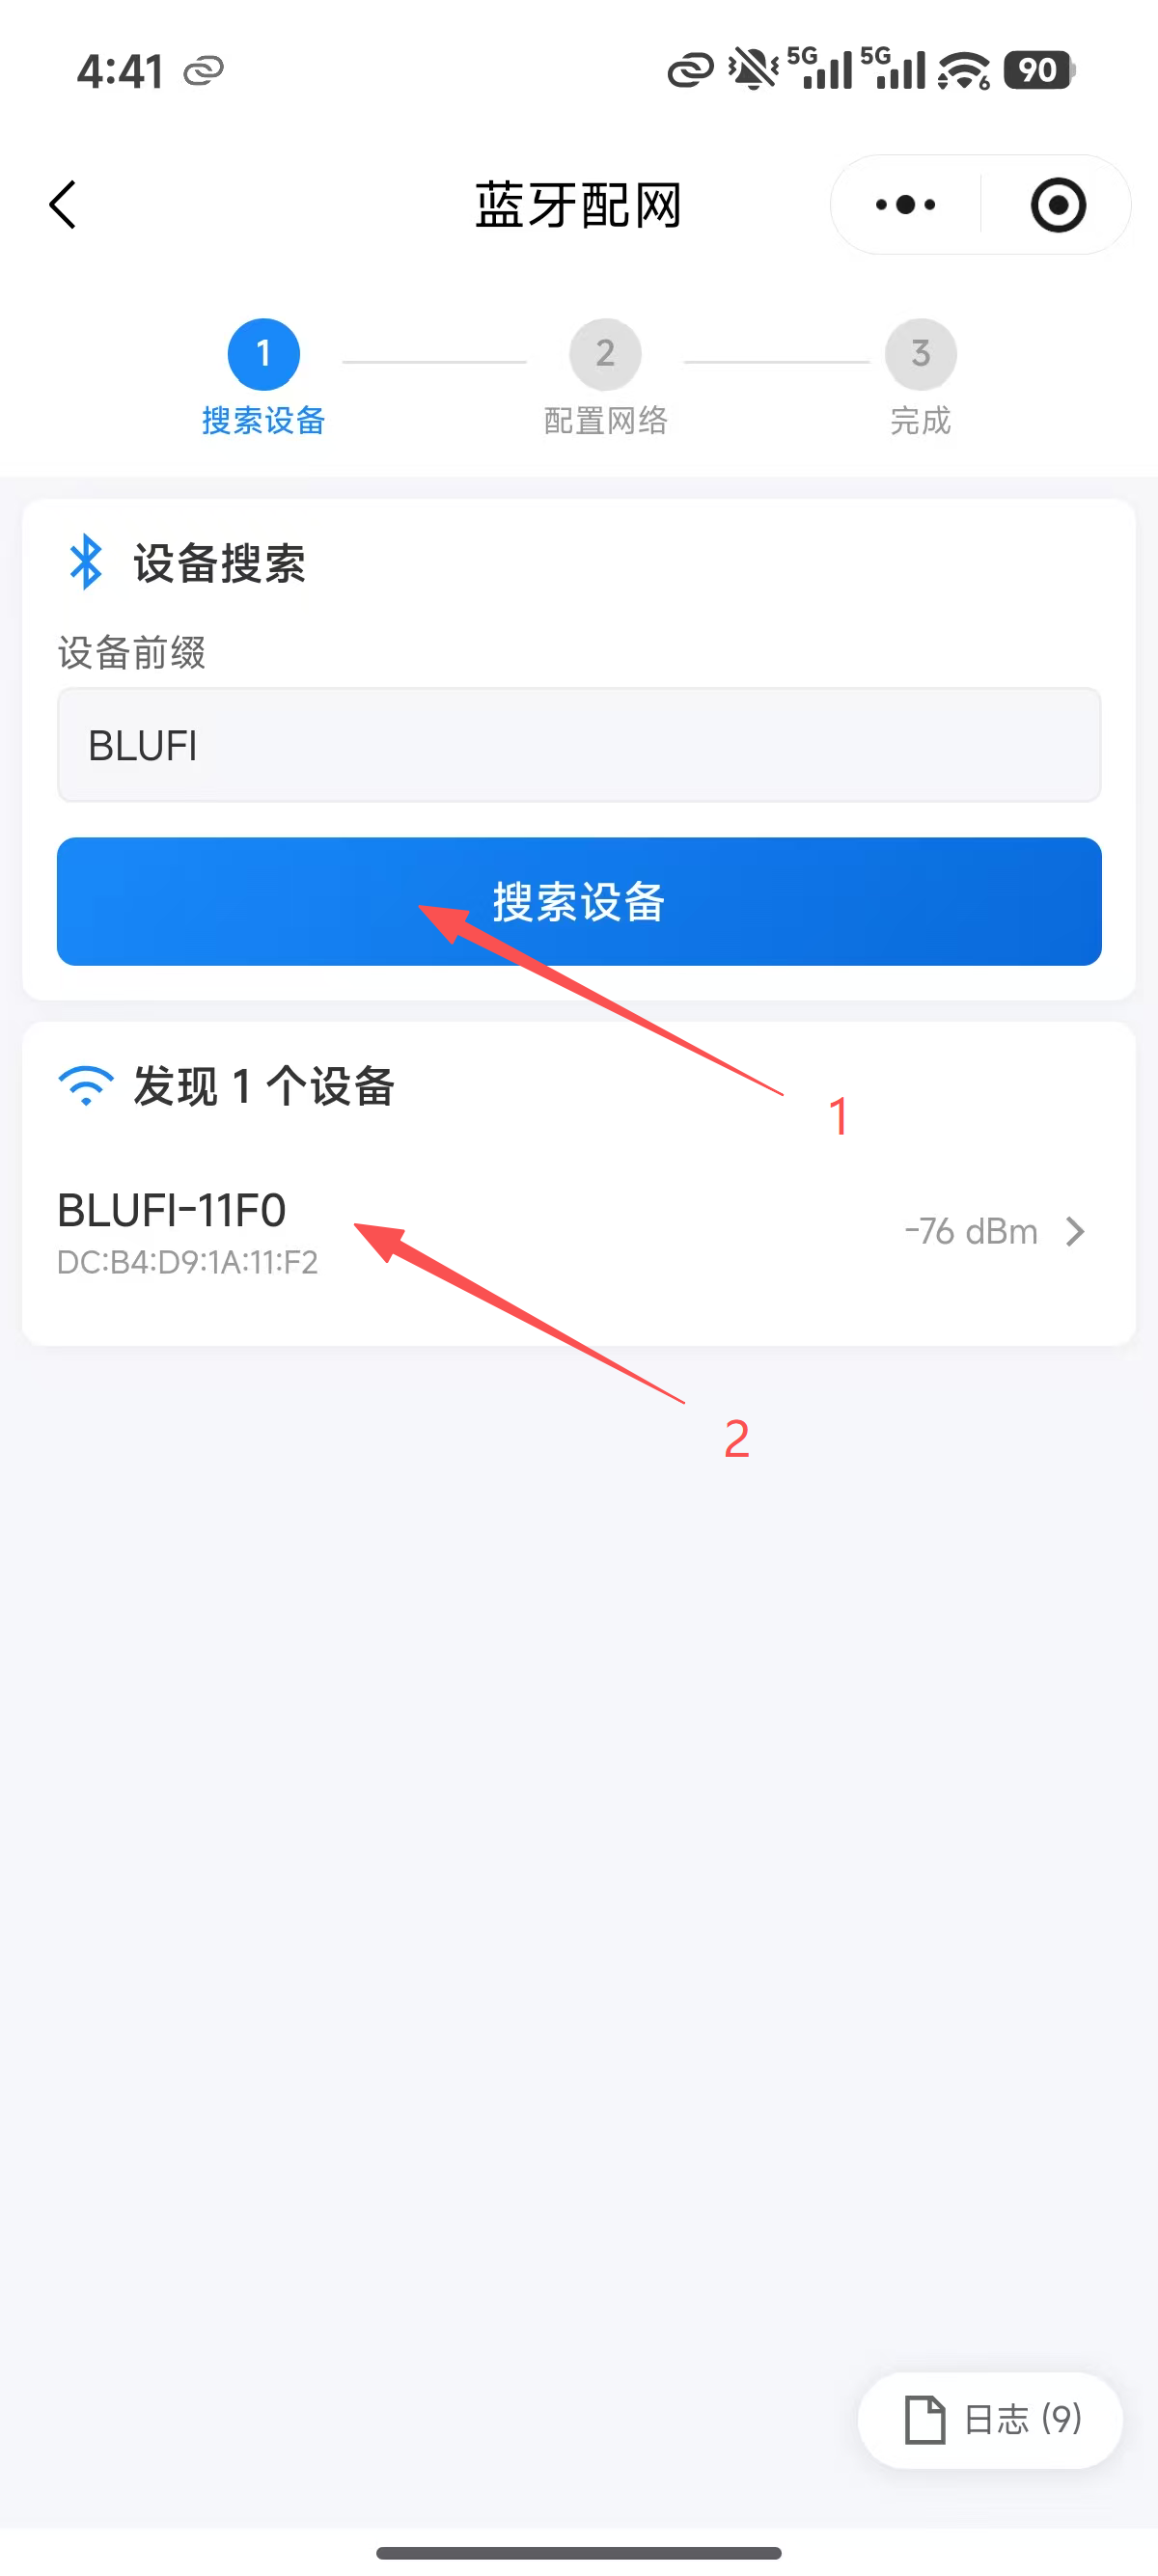
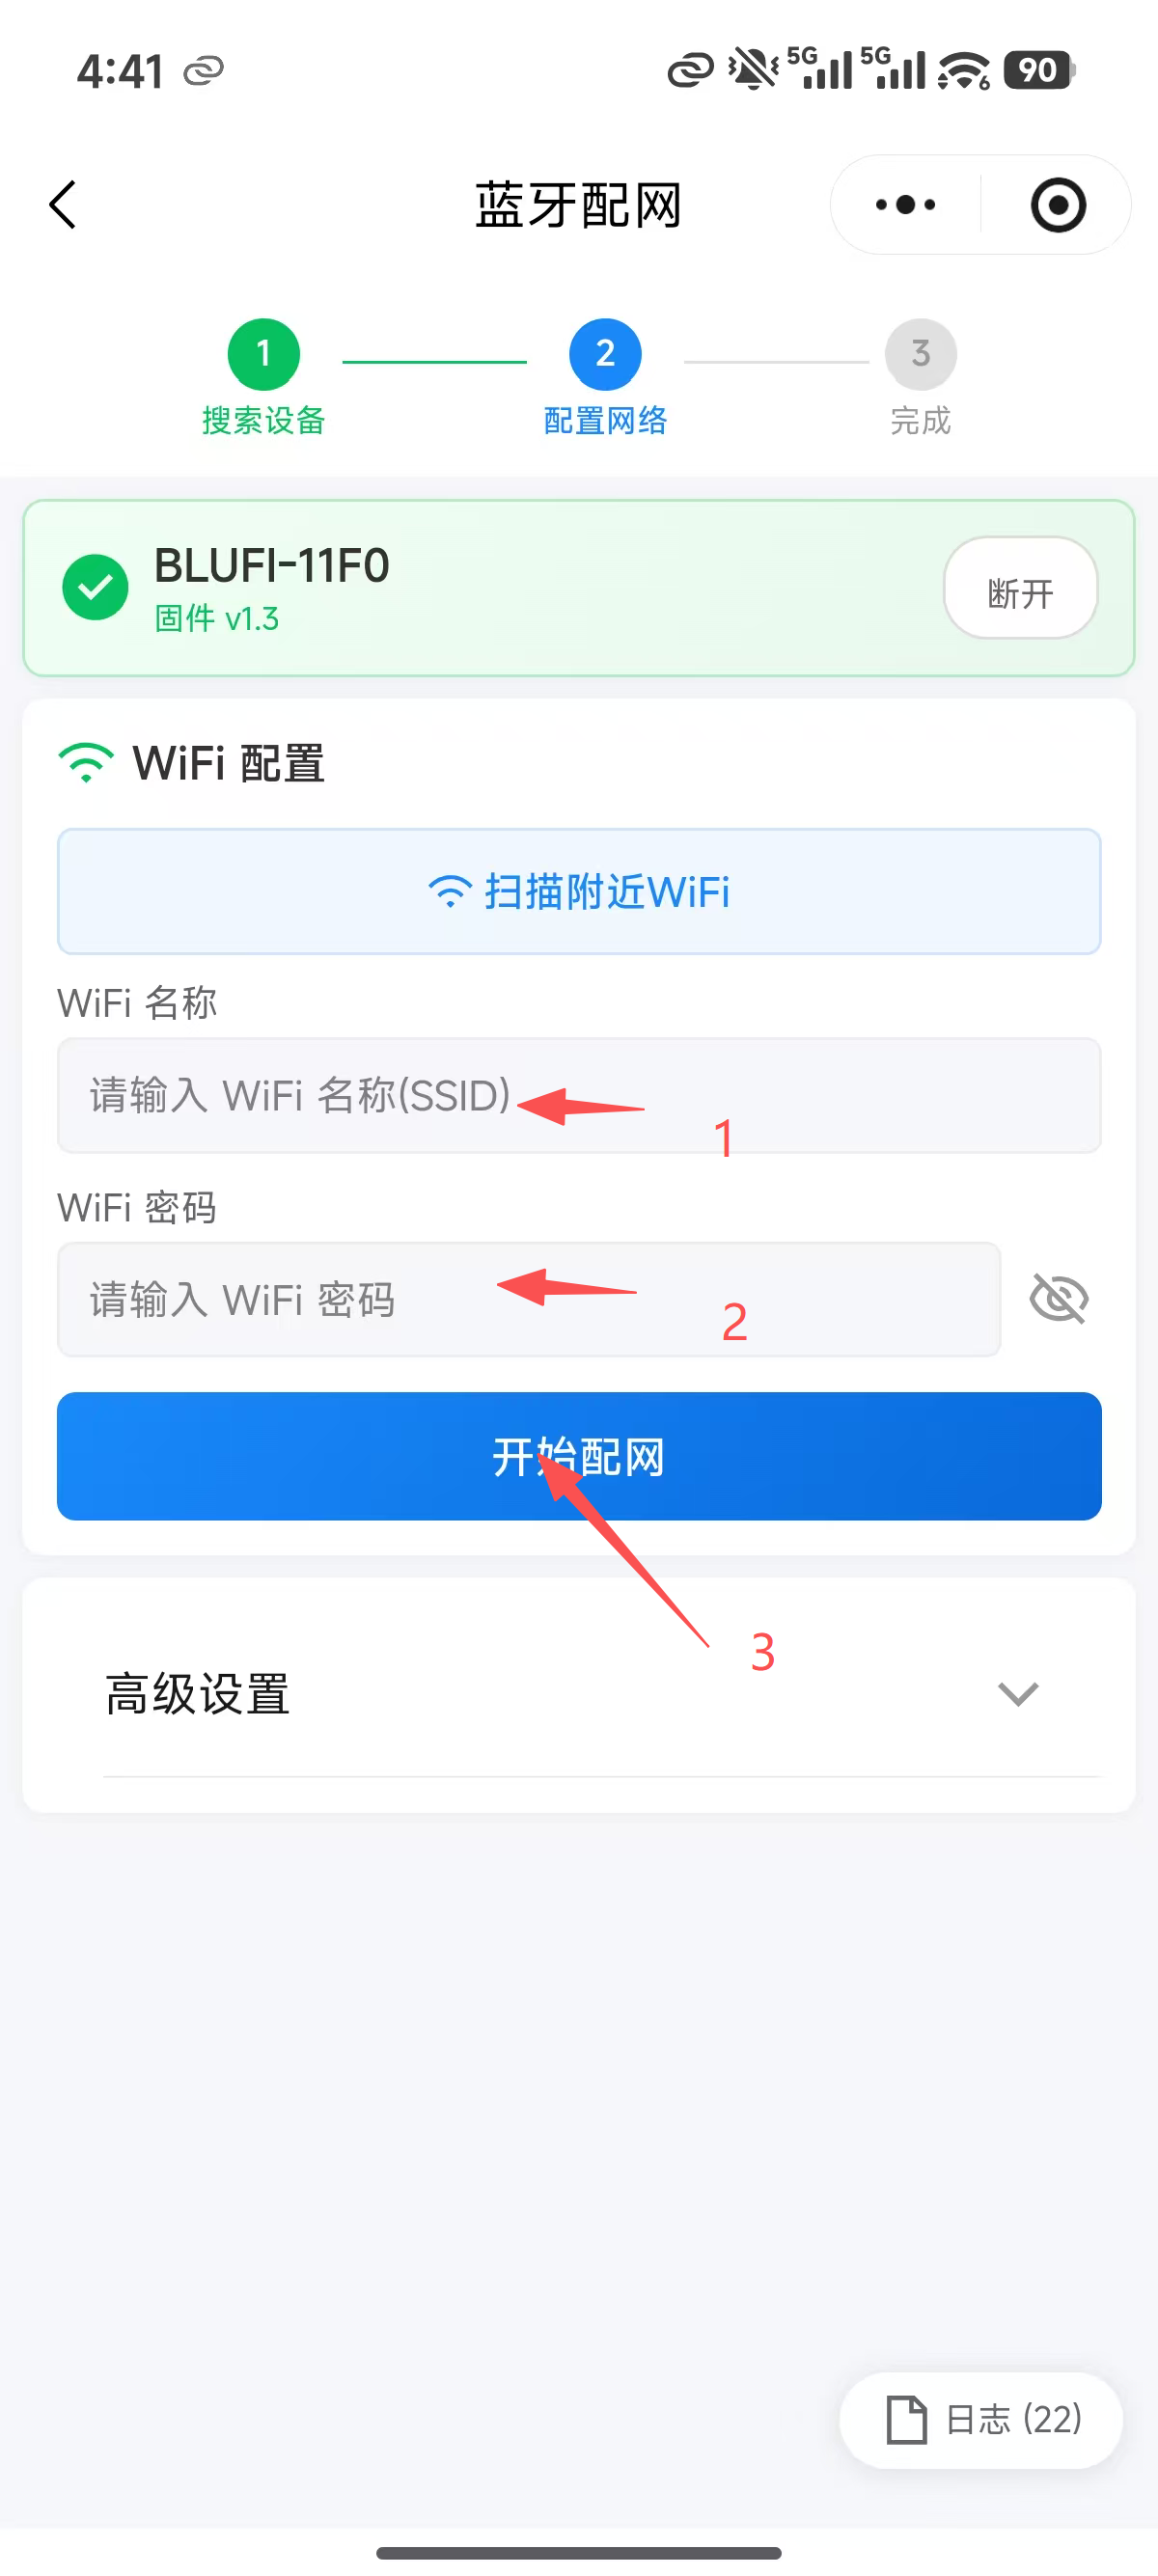
Tap BLE Setup to open BLE provisioning. Scan the QR code on the device with WeChat, or search for the mini program 艾塔达克. Register or sign in before provisioning if prompted.
Mini program flow:
| Open the mini program | Select BLE setup | Complete Wi-Fi setup |
|---|---|---|
 |  |  |
4. Service Provider and Device Binding
4.1 Service Provider Settings
Before using the xiaozhi voice assistant, set the server address first. The screen configuration supports three service provider options. Open the Settings app and tap Advanced, as shown below.
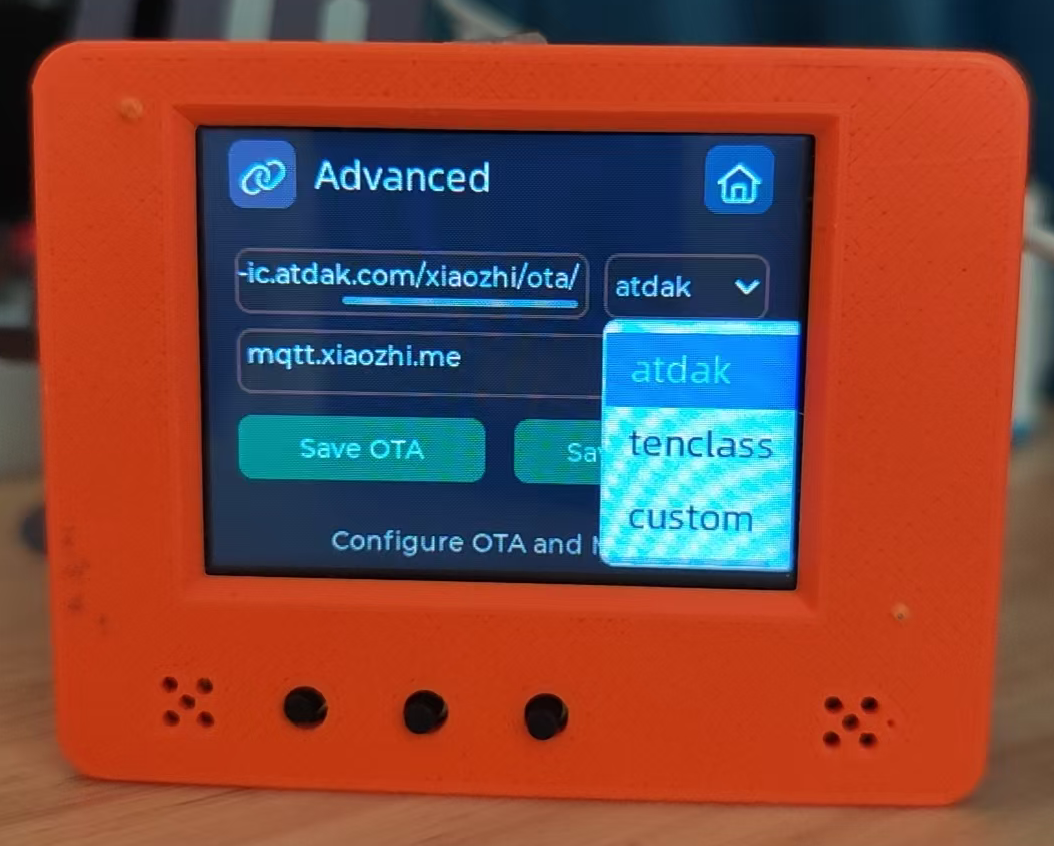
Here, atdak is the RYMCU official server, tenclass is the Xiage Xiaozhi AI official server, and custom is a custom server where you can enter your own server address.
The factory default uses the RYMCU official server.
4.2 Device Binding
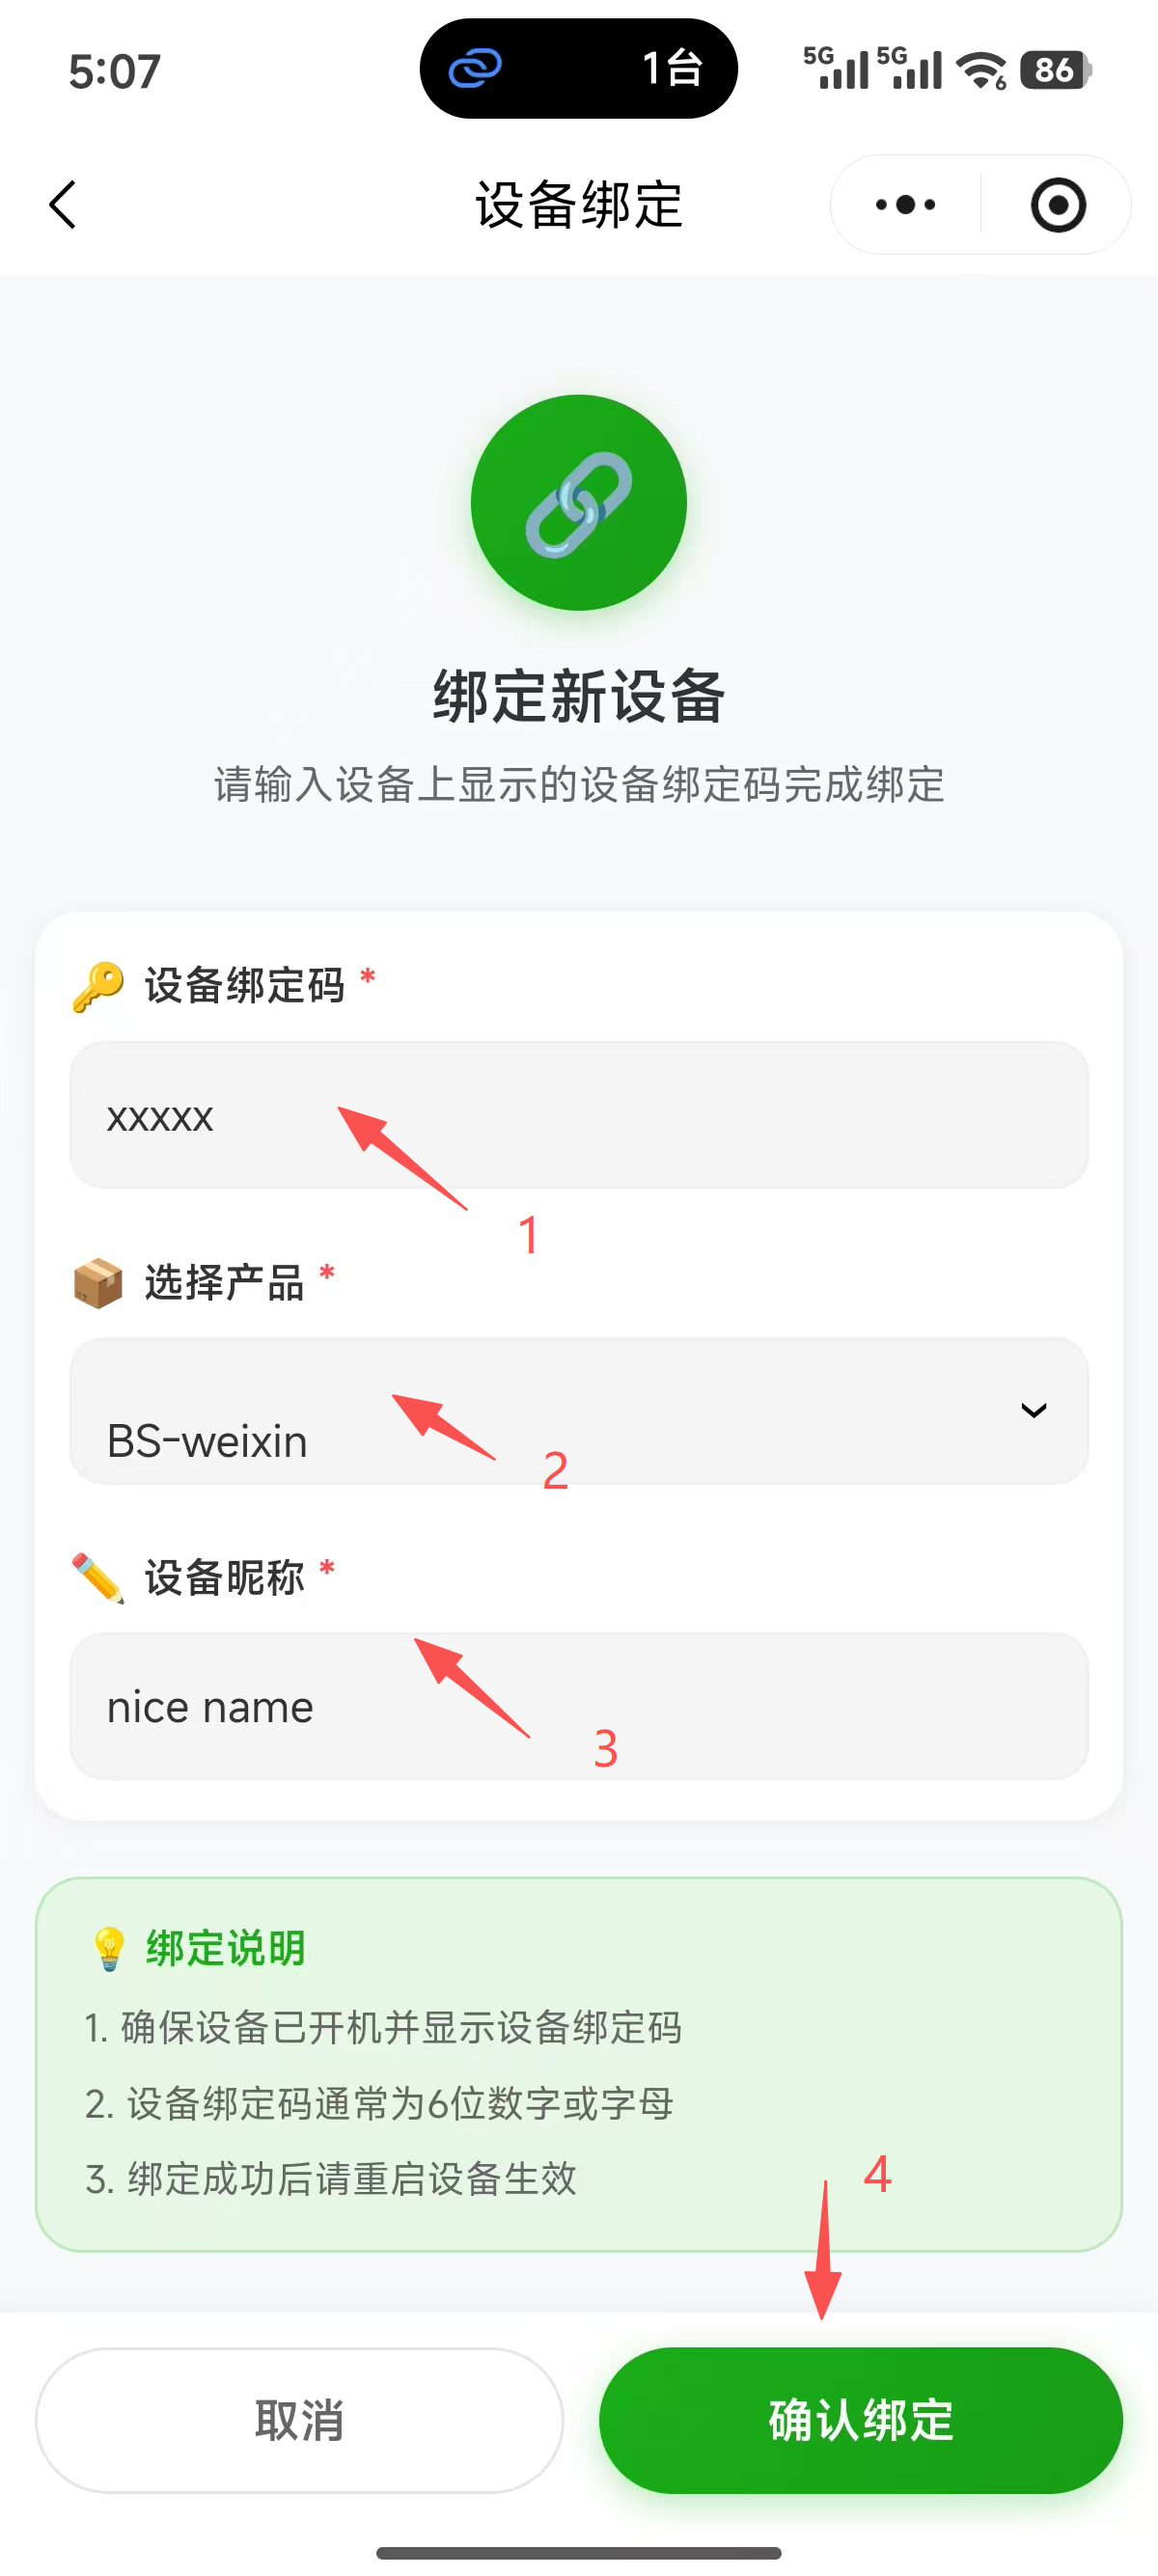
For first-time use, after entering the Xiaozhi app, the device screen shows an activation code or binding code. Enter that code in the corresponding mini program or web console and confirm the binding.
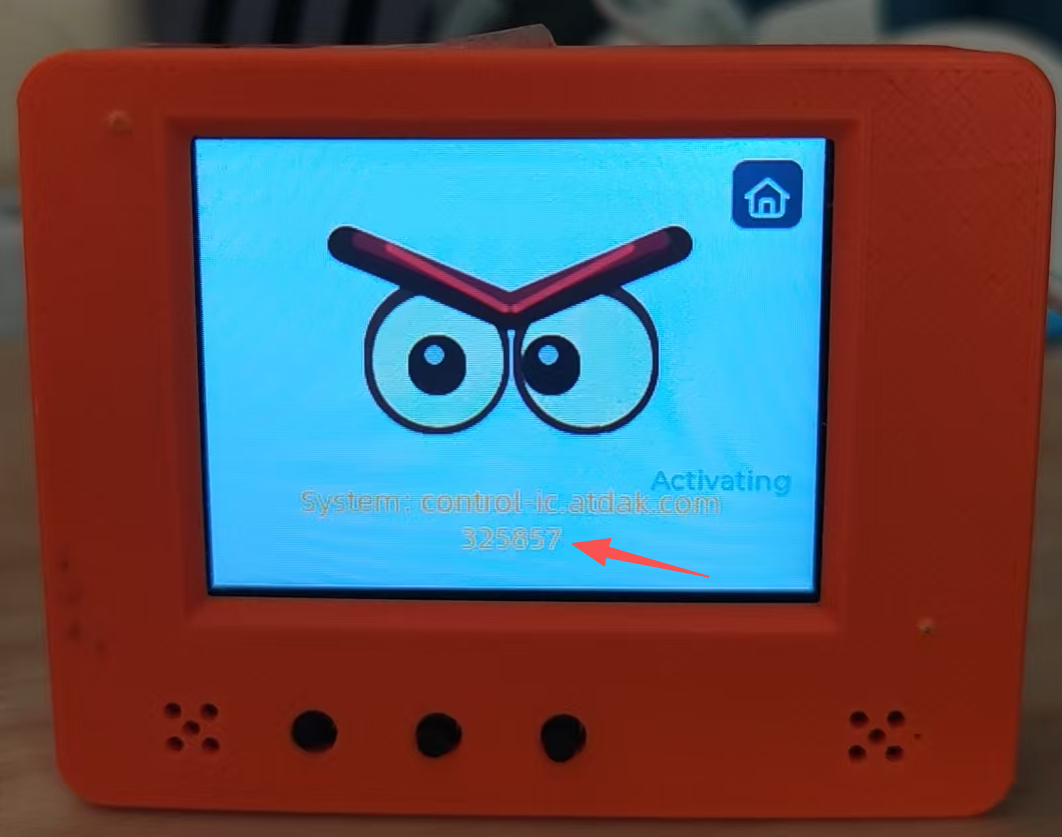
Choose any one of the following three methods. Make sure it matches the configured service provider. The factory default is the first one.
4.2.1 RYMCU Official Server Verification-Code Binding
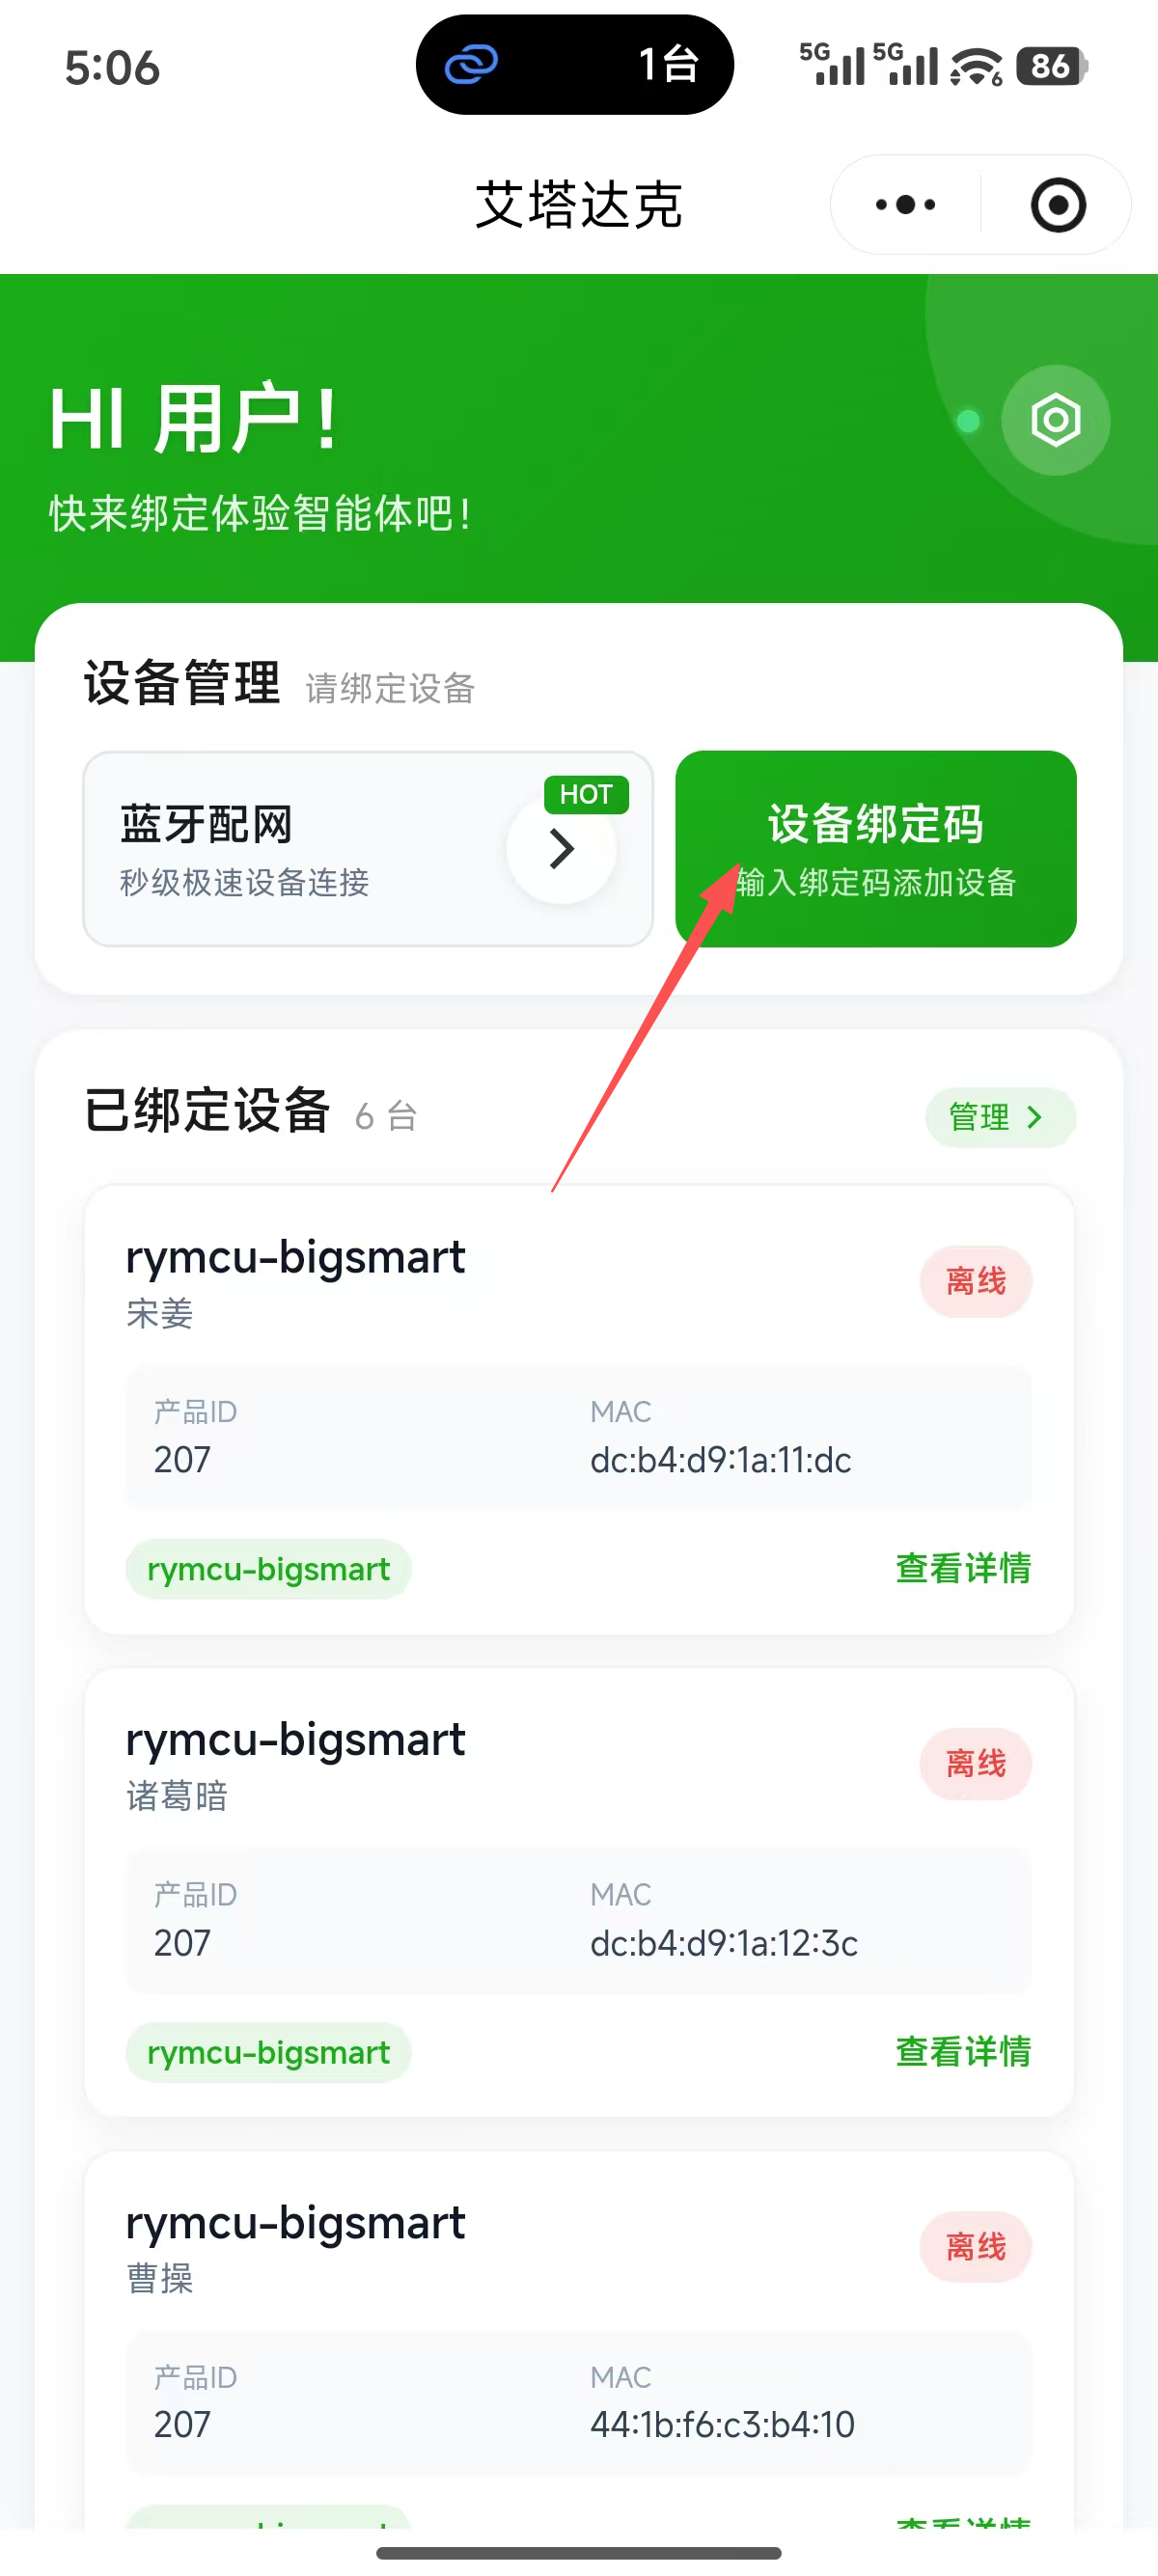
Log in to the WeChat mini program "艾塔达克" and bind the device as shown below.
| Device list entry | Enter binding information |
|---|---|
 |  |
4.2.2 tenclass Xiaozhi AI Official Server Verification-Code Binding
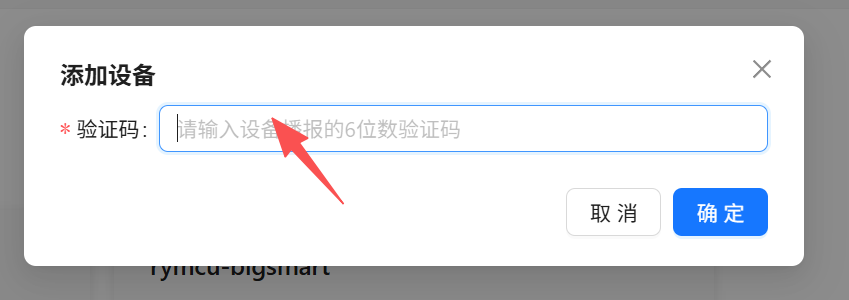
Log in to the official console at https://xiaozhi.me/console/agents, click "Device Management", then click "Add Device". Enter the 6-digit verification code spoken by the device or shown on the screen in the add-device dialog.
4.2.3 Custom Server Verification-Code Binding
Bind the device according to your custom server.
In addition, the RYMCU official server is open source and can be self-deployed if you have the required technical foundation. Server link: https://github.com/ruanrongman/IntelliConnect
5. AI Assistant Usage
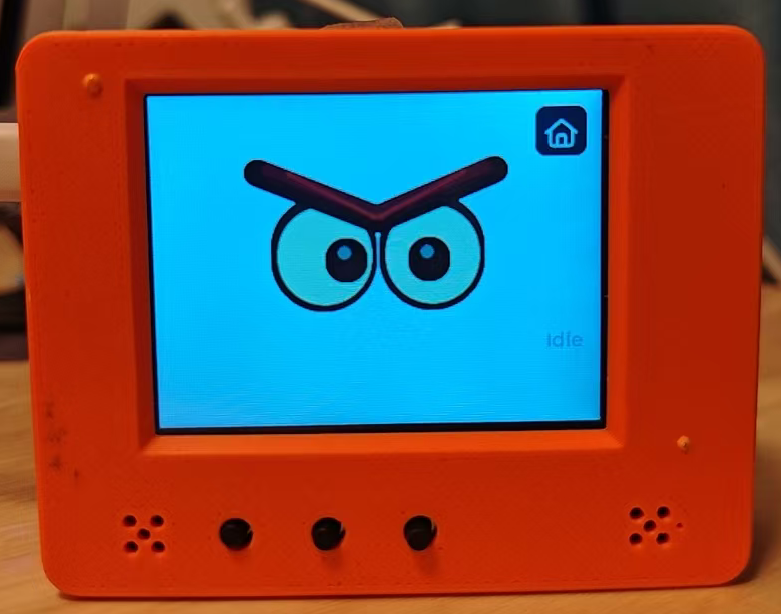
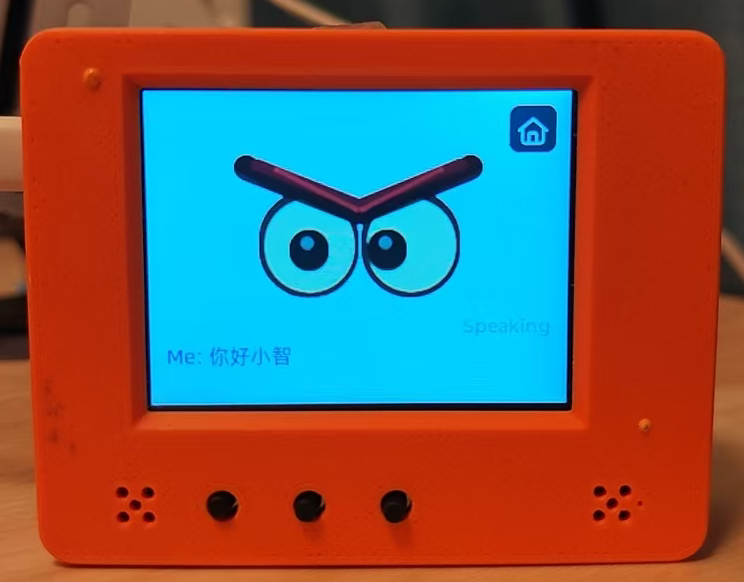
After wifi and server configuration are complete, tap the xiaozhi app on the screen to enter the AI assistant. After initialization finishes and the idle page appears, wake it by saying "Ni hao, Xiaozhi", or press the middle boot button to wake it.
| Idle page | Wakeup page |
|---|---|
 |  |
6. Music and Video Playback
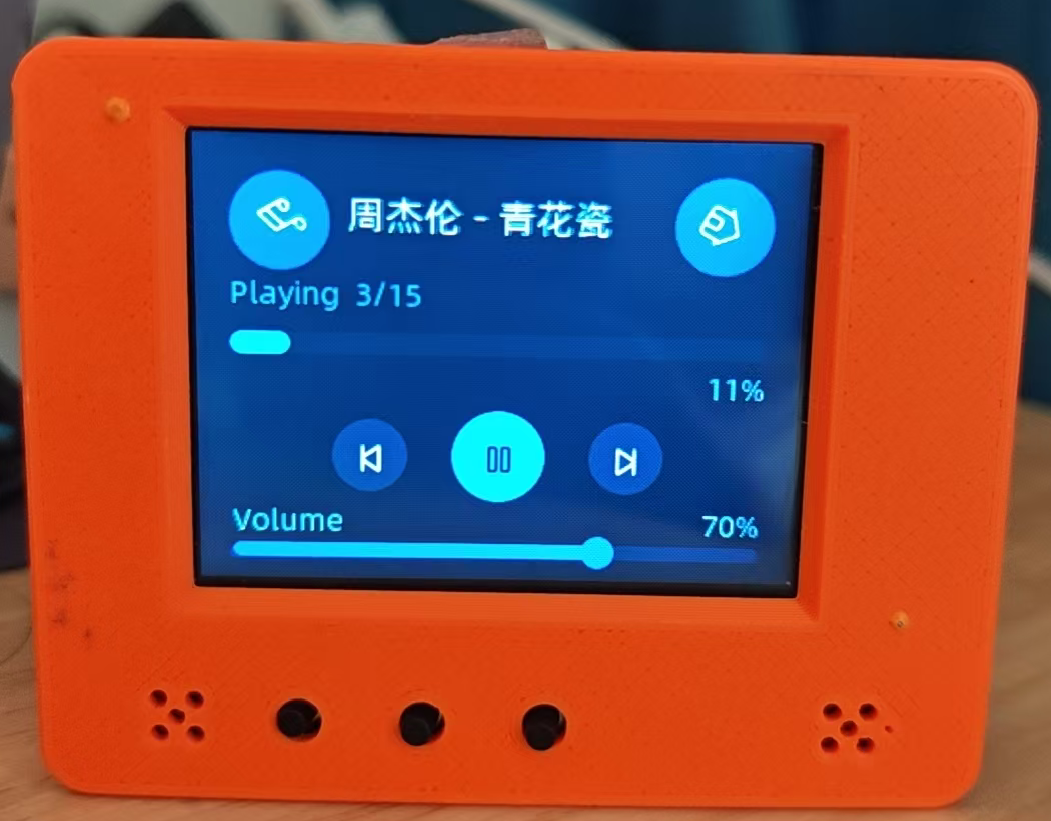
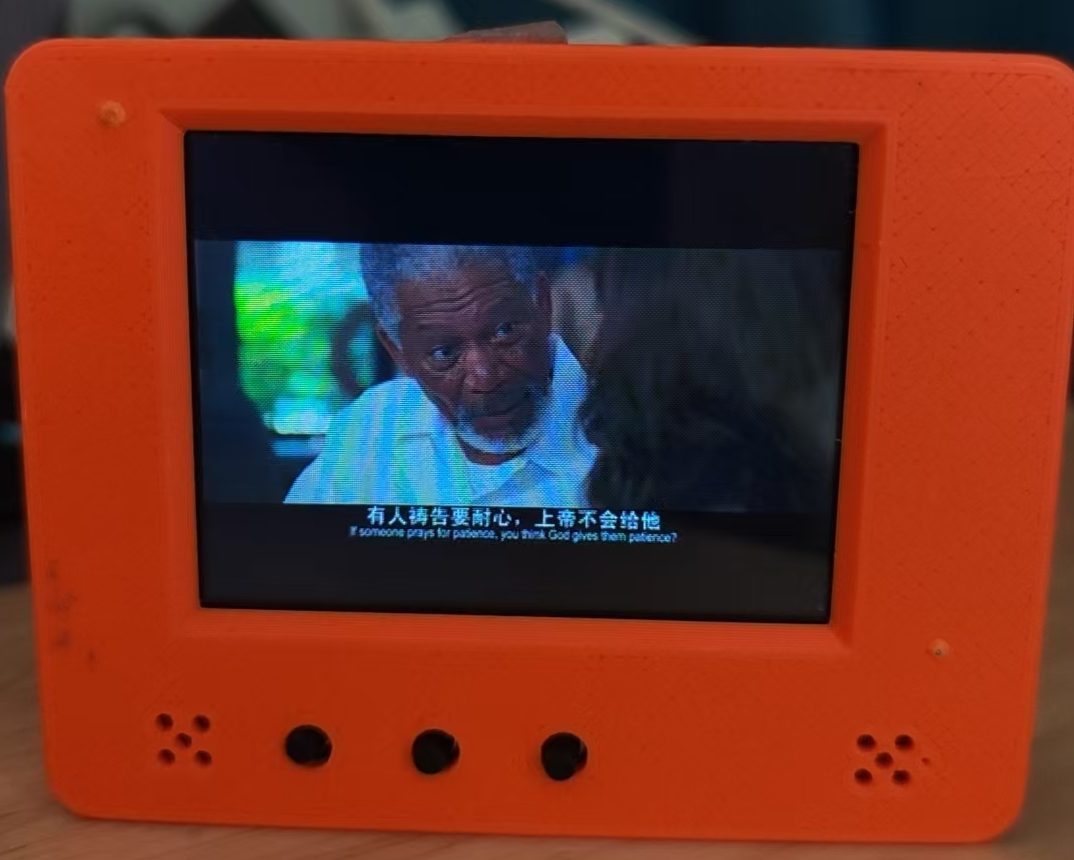
Tap the Music app and Video app on the screen to play mp3 music and videos from the SD card.
| Music playback | Video playback |
|---|---|
 |  |
Copy mp3 music and video files to the music and videos folders on the SD card in advance. See the next section for the operation method.
7. USB Disk Mode
USB disk mode shares the SD card with a computer as a USB drive. It is useful for quickly copying music, videos, background images, and other resources.
Enter USB disk mode:
Tap the USB Disk app on the screen to enter USB-to-drive mode. Connect the device to a computer with a USB cable, and the computer will show the SD card as a USB drive.
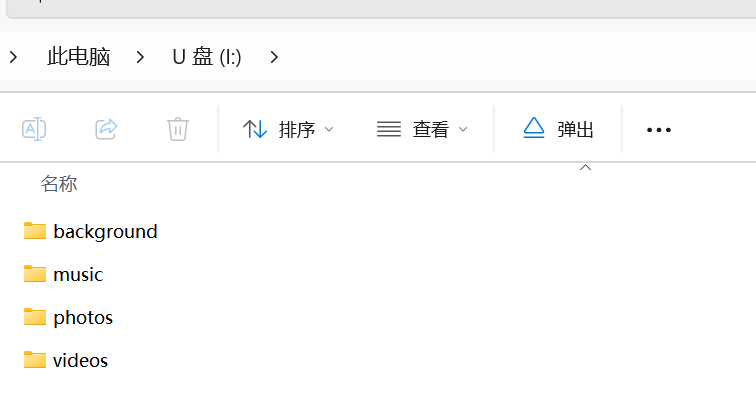
Copy MP3 files to the music folder.
Regular video files need to be converted to a format suitable for playback on the bigsmart AI assistant, then placed in the videos directory. Use the repository Video Converter for conversion.
8. Internet Radio
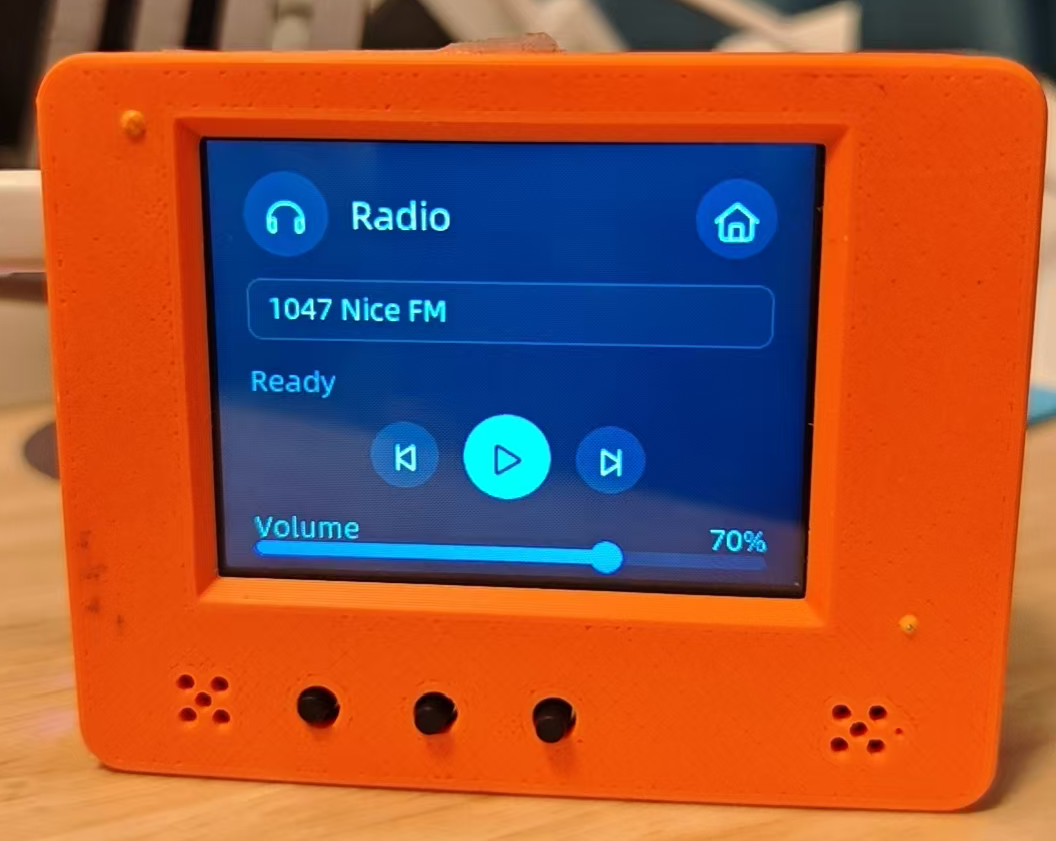
Tap the Radio app to play internet radio stations.
9. Games
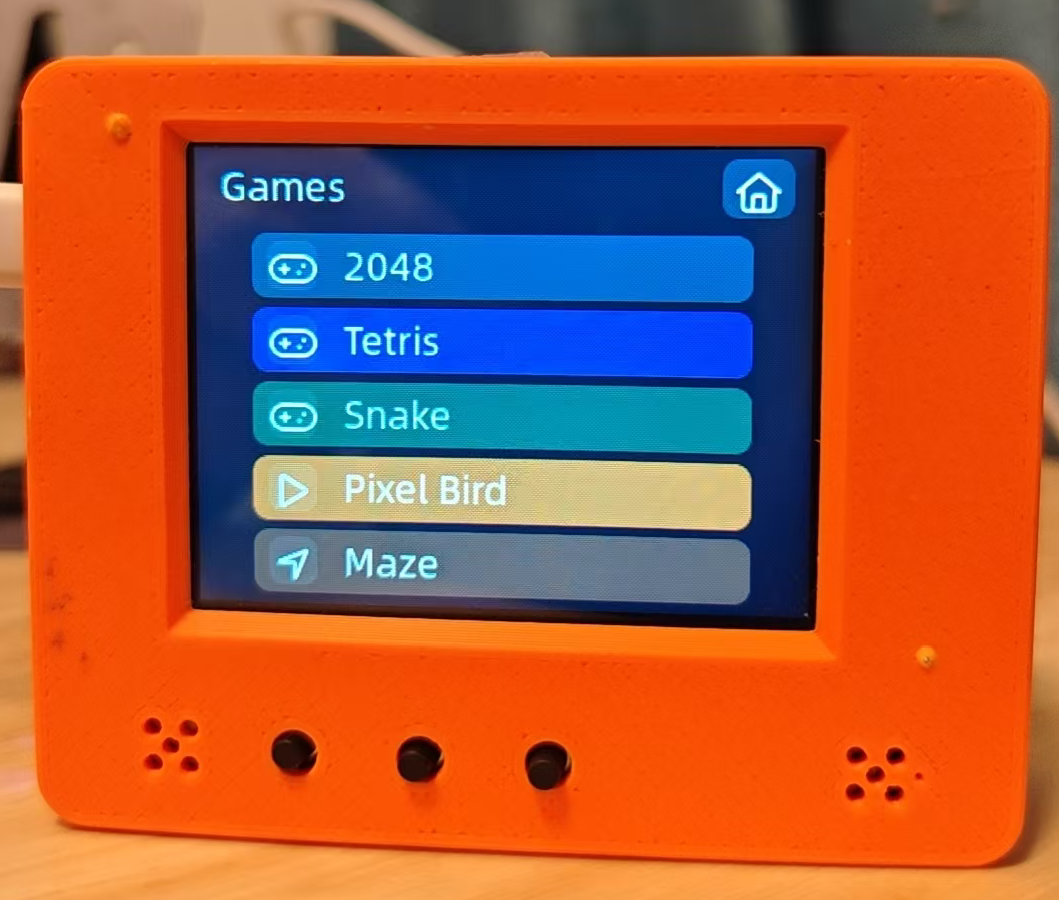
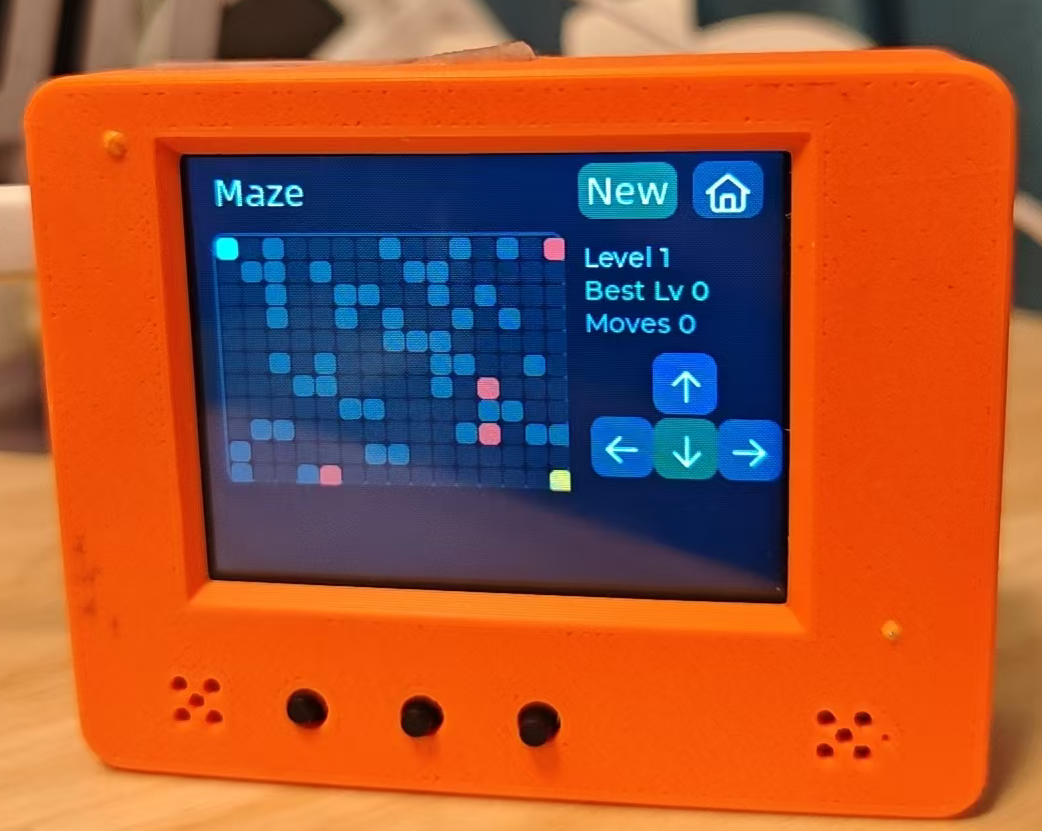
Tap the Games app to play multiple games.
| Game list | Maze game |
|---|---|
 |  |
10. Extended Features
BigSmart firmware also registers local features and MCP tools:
| Feature | Description |
|---|---|
| Weather and Calendar | V2.3.28 firmware provides Weather and Calendar app entries |
| Codex Status | Shows Codex runtime status and bridge settings on the device |
| RGB LED | Set RGB colors and turn the light off |
| IMU attitude and shake | QMI8658 reads attitude data and supports shake detection |
| Smart Home MQTT/Endpoint | Configures the Smart Home MQTT broker and routes MCP Endpoint calls to the same smart home tools |
| NES dedicated boot mode | Selects an SD-card ROM from the NES launcher and reboots into the dedicated mode |
| Camera | GC0308 is lazily initialized when opening Camera or requesting camera capability for the first time |
11. Troubleshooting
| Problem | Suggestion |
|---|---|
| Screen does not turn on | Hold the power button for about 3 seconds; check battery level, USB power, and cable |
| No serial port on PC | Use a data-capable USB cable and check drivers/device manager |
| Wi-Fi not found | Use 2.4 GHz Wi-Fi and retry near the router |
| Cannot enter Wi-Fi setup | Open the Wi-Fi page from Settings, or reboot and restart the provisioning flow |
| SD card mount fails | Use FAT32, reinsert the card, or try another card |
| Video app shows no files | Put files under /sdcard/videos; at least a .mjpg file is required |
| Video has no sound | Make sure a same-name .mp3 file exists |
| Video speed is wrong | Make sure the same-name .fps file contains an integer frame rate |
| MP3 playback fails | Use an absolute /sdcard/... path and confirm the .mp3 extension |
| USB disk mode does not enter | Hold GPIO10 before startup/reset and make sure an SD card is inserted |
| NES games are not listed | Make sure the SD card is mounted and .nes ROMs are in the firmware-recognized SD card directory |
| Codex status cannot connect | Make sure the device and PC are on the same LAN and the bridge address is configured in the Codex app |
| Voice recognition has echo | Double-click Boot while idle to toggle device-side AEC |